
Fort Knox Safe
We have got such a circle:
Now we’ll represent a new layer and mark it out both with this circle. Press after that on CTRL+E for the layers to merge down.
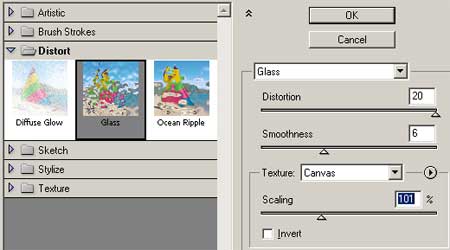
Enter Filter>Distort>Glass and set the next parameters:
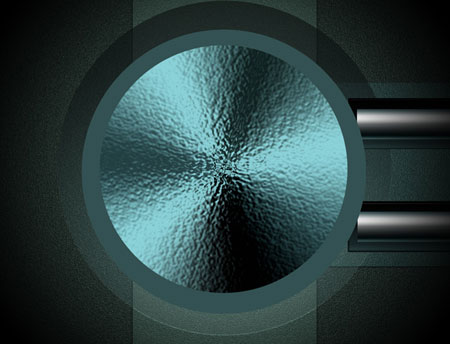
This is what we have got:

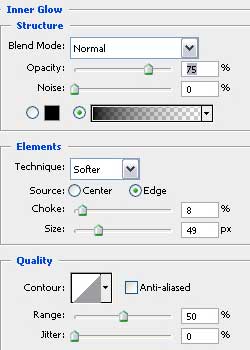
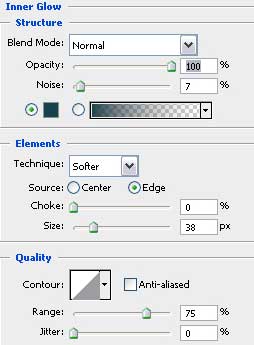
Apply on this layer the Blending Options – Inner Glow:
Choose again the Ellipse Tool (U) to represent one more circle:
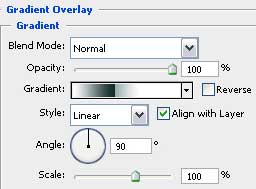
Apply Blending Options>Gradient Overlay
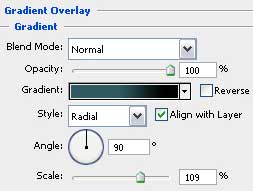
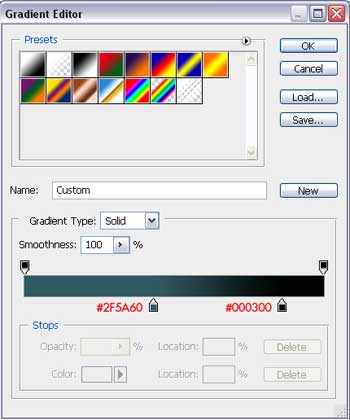
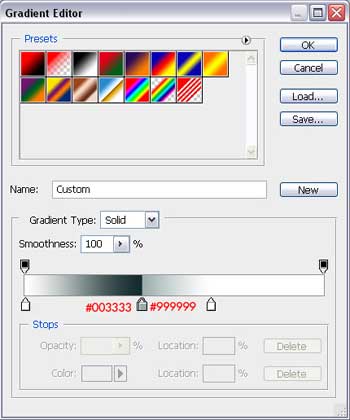
Blending Options>Gradient Editor
We’ll get the next result:

Continue by drawing the door’s roundness. In this case we’ll need the Custom Shape Tool (U) – Circle Frame
Place the shape the same way it is shown below:

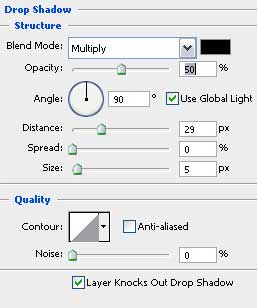
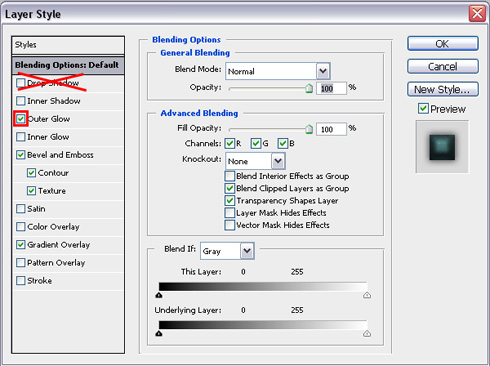
Blending Options>Drop Shadow
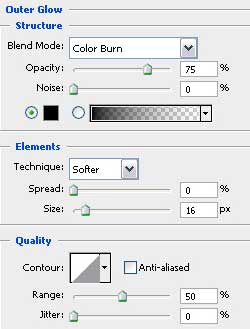
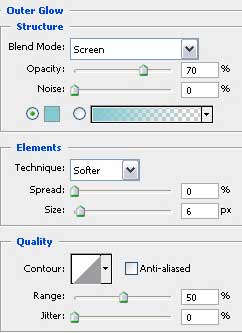
 Blending Options>Outer Glow:
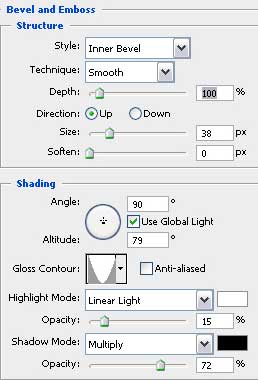
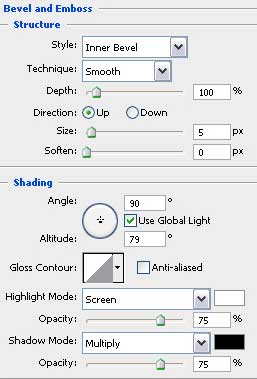
Blending Options>Bevel and Emboss
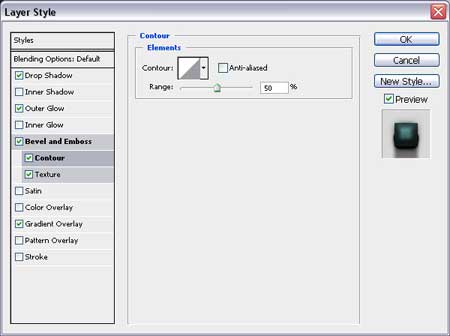
Blending Options>Bevel and Emboss>Contour
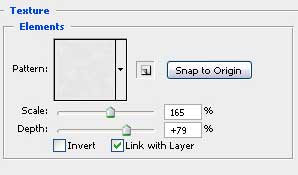
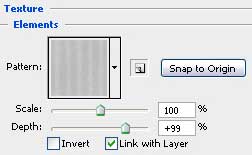
Blending Options>Bevel and Emboss>Texture – Color Paper>Gold Parchment
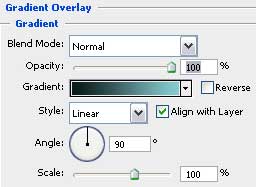
Blending Options>Gradient Overlay
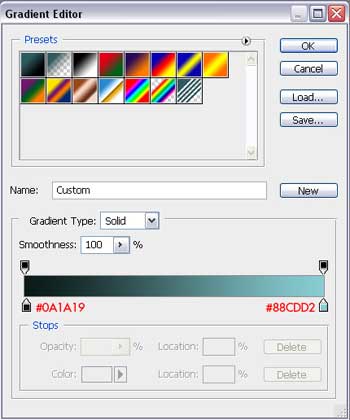
Blending Options>Gradient Editor
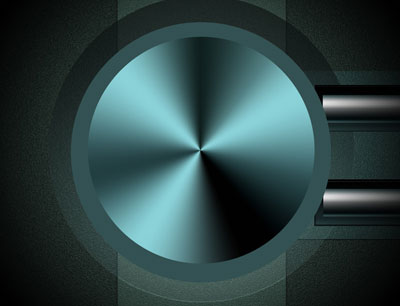
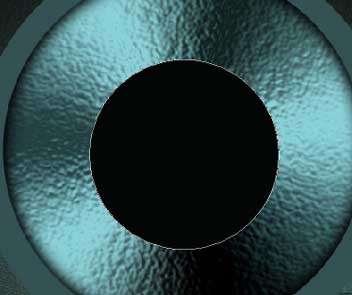
Finally we must get such a metallic circle, like that one demonstrated on the picture:

Make a copy of this circle, but the copy should be smaller and it is possible to do that with Free Transform option.
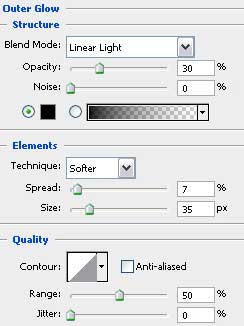
 The parameters of the copied circle are the same, but we need to hide the Drop Shadow and change the parameters of the Outer Glow.
Outer Glow
On the central part we’ll place a metallic star:

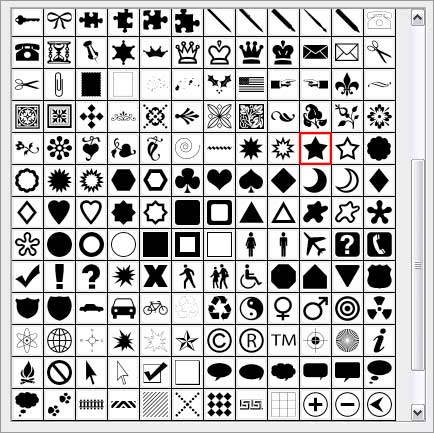
Select Custom Shape Tool (U) – 5 Point Star.
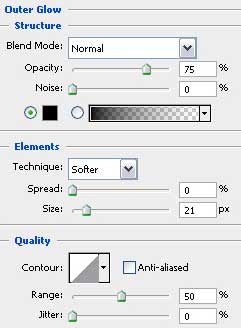
Blending Options>Outer Glow
Blending Options>Inner Glow
Blending Options>Bevel and Emboss
Blending Options>Bevel and Emboss>Texture
The texture’s name is Color Paper>Blue Vellum
 Blending Options>Gradient Overlay
Blending Options>Gradient Editor
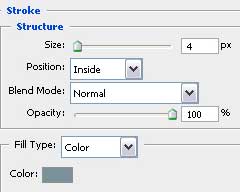
Blending Options>Stroke
This is what we should get when finishing setting and applying the parameters:

We have to draw the last element. It’s the orifices on the door, represented on all around the door.

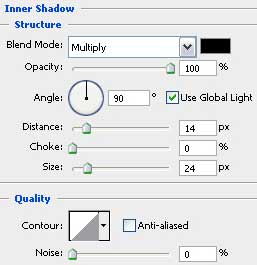
It’s necessary to take the Ellipse tool (U) and draw a small circle, colored with #669999 and then select the Blending Options>Inner Shadow for setting the parameters from below:
Blending Options>Outer Glow
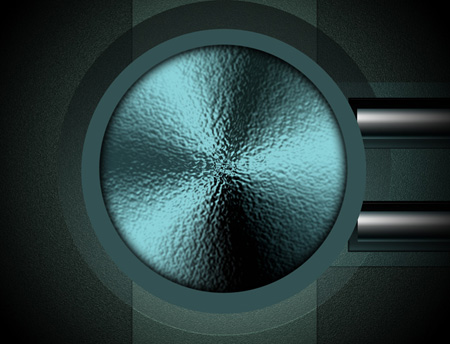
The final result is this one!

View full size here.
Page: 1 2
Comments