
Flash 8 Basics: The Main Toolbar and Edit Bar
The Main Toolbar and Edit Bar
The menu bar at the top of the Flash application window displays menus with commands for controlling Flash functionality. The menus include File, Edit, View, Insert, Modify, Text, Commands, Control, Window, and Help.
The edit bar, at the top of the Timeline, contains controls and information for editing scenes and symbols, and for changing the magnification level of the Stage.
For information on changing the Stage magnification level, see “Zooming.” For information on editing symbols, see “Using Symbols, Instances, and Library Assets” in Using Flash. For information on working with scenes, see “Working with Scenes” in Using Flash.
Using the Tools Panel
The tools in the Tools panel let you draw, paint, select, and modify artwork, as well as change the view of the Stage. The Tools panel is divided into four sections:
- The tools area contains drawing, painting, and selection tools.
- The view area contains tools for zooming and panning in the application window.
- The colors area contains modifiers for stroke and fill colors.
- The options area displays modifiers for the currently selected tool. Modifiers affect the tool’s painting or editing operations.
Using the Customize Tools panel dialog box, you can specify which tools to display in the Flash authoring environment. For more information, see “Customizing the Tools Panel.”
For information on using the drawing and painting tools, see “About Flash Drawing and Painting Tools” in Using Flash. For information on using the selection tools, see “Selecting Objects” in Using Flash. For information on using the view modification tools, see “Moving the View of the Stage.”

To show or hide the Tools panel:
- Select Window > Tools.
Selecting Tools
You can select tools by clicking in the Tools panel, or by using a keyboard shortcut.
To select a tool, do one of the following:
- Click the tool you want to use. Depending on the tool you select, a set of modifiers may be displayed in the options area at the bottom of the Tools panel.
- Press the tool’s keyboard shortcut. You can view the keyboard shortcuts by selecting Edit > Keyboard Shortcuts.
To select a tool located in the pop-up menu for a visible tool such as the Rectangle tool, press the icon of the visible tool and select another tool from the pop-up menu.
Customizing the Tools Panel
You can customize the Tools panel to specify which tools appear in the authoring environment. You use the Customize Tools panel dialog box to add or remove tools from the Tools panel.
You can display more than one tool in one location. When more than one tool is displayed in a location, the top tool in the group (the most recently used) is displayed with an arrow in the lower-right corner of its icon. When you press and hold the mouse button on the icon, the other tools in the group appear in a pop-up menu. You can then select a tool from the menu.
To customize the Tools panel:
-
Do one of the following:
- (Windows) Select Edit > Customize Tools panel
- (Macintosh) Select Flash > Customize Tools panel
- Click a tool in the Tools panel image or use the arrows to cycle through the tools to specify the location to which you want to assign another tool.
- To add a tool to the selected location, select the tool in the Available Tools list and click the Add button. It is possible to assign a tool to more than one location.
- To remove a tool from the selected location, select the tool in the Current Selection scroll list and click the Remove button.
- Click OK to apply your changes and close the Customize Tools panel dialog box.
The Available Tools menu indicates the tools that are currently available in the Flash. The Current Selection menu indicates the tool (or tools) currently assigned to the selected location in the Tools panel.
Note: If more than one tool is assigned to one location in the Tools panel, a small arrow appears in the lower-right corner of the tool. This arrow indicates that additional tools are present in a pop-up menu. The same keyboard shortcut functions for all tools in the pop-up menu.
To restore the default Tools panel layout:
- Click Restore Default in the Customize Tools panel dialog box.
Using the Grid, Guides, and Rulers
Flash can display rulers and guides that help you draw and lay out objects precisely. You can place guides in a document and snap objects to those guides, or turn on the grid and snap objects to it.
Note: You can also snap objects to other objects or to pixels, or align objects using specified snap tolerance boundaries. For more information, see “Snapping” in Using Flash.
Using Rulers
When rulers are displayed, they appear along the top and left sides of the document. You can change the unit of measure used in the rulers from the default of pixels to some other unit. When you move an element on the Stage with the rulers displayed, lines indicating the element’s dimensions appear on the rulers.
To display or hide rulers:
- Select View > Rulers
To specify the rulers’ unit of measure for a document:
- Select Modify > Document and then select a unit from the Ruler Units menu at the lower-left side of the dialog box
Using Guides
You can drag horizontal and vertical guides from the rulers onto the Stage when the rulers are displayed. You can move guides, lock guides, hide guides, and remove guides. You can also snap objects to guides, and change the guide color and snap tolerance (how close objects must be to snap to a guide). Flash allows you to create nested Timelines. Draggable guides appear on Stage only when the Timeline in which they were created is active.
You can clear all the guides in the current editing mode—document-editing mode or symbol-editing mode. If you clear guides in document-editing mode, all the guides in the document are cleared. If you clear guides in symbol-editing mode, all the guides in all symbols are cleared.
To create custom guides or irregular guides, you use guide layers.
To display or hide the drawing guides:
- Select View > Guides > Show Guides
Note: If the grid is visible and Snap to Grid is turned on when you create guides, guides will snap to the grid.
To turn snapping to guides on or off:
- Select View > Snapping > Snap to Guides
Note: Snapping to guides takes precedence over snapping to the grid in places where guides fall between grid lines.
To move a guide:
- Make sure rulers are visible by selecting View > Rulers.
- With the Selection tool, click anywhere on the ruler and drag the guide to the desired place on the Stage.
To remove a guide:
- With guides unlocked, use the Selection tool to drag the guide to the horizontal or vertical ruler. For information on locking and unlocking guides, see the following procedure.
To lock guides:
- Select View > Guides > Lock Guides
Note: You can also use the Lock Guides option in the Edit Guides (View > Guides > Edit Guides) dialog box. For more information, see the following procedure.
To set guide preferences:
-
Select View > Guides > Edit Guides and do any of the following:
- For Color, click the triangle in the color box and select a guide line color from the palette. The default guide color is green.
- Select or deselect Show Guides to display or hide guides.
- Select or deselect Snap to Guides to turn snapping to guides on or off.
- Select or deselect Lock Guides to lock or unlock guides.
- For Snap Accuracy, select an option from the pop-up menu.
- If you want to remove all guides, click Clear All.
- Clear All removes all guides from the current scene.
- If you want to save the current settings as the default, click Save Default.
- 2. Click OK.
To clear guides:
- Select View > Guides > Clear Guides.
If you are in document-editing mode, all guides in the document are cleared. If you are in symbol-editing mode, only guides used in symbols are cleared.
Using the Grid
When the grid is displayed in a document, it appears as a set of lines behind the artwork in all scenes. You can snap objects to the grid, and you can modify the grid size and grid line color.
To display or hide the drawing grid, do one of the following:
- Select View > Grid > Show Grid.
- Press Control+” (quote) (Windows) or Command+” (quote) (Macintosh).
To turn snapping to grid lines on or off:
- Select View > Snapping > Snap to Grid.
To set grid preferences:
- Select View > Grid > Edit Grid.
- For Color, click the triangle in the color box and select a grid line color from the palette. The default grid line color is gray.
- Select or deselect Show Grid to display or hide the grid.
- Select or deselect Snap to Grid to turn snapping to grid lines on or off.
- For grid spacing, enter values in the text boxes to the right of the horizontal and vertical arrows.
- For Snap Accuracy, select an option from the pop-up menu.
- If you want to save the current settings as the default, click Save Default.
Using Panels and the Property Inspector
Flash offers many ways to customize the workspace to your needs. Using panels and the Property inspector, you can view, organize, and change media and other assets and their attributes. You can show, hide, and resize panels. You can also group panels together and save custom panel sets to make the workspace match your personal preferences. The Property inspector changes to reflect the tool or asset you are working with, giving you quick access to frequently used features.
About the Property Inspector
The Property inspector simplifies document creation by making it easy to access the most commonly used attributes of the current selection, either on the Stage or in the Timeline. You can make changes to the object or document attributes in the Property inspector without accessing the menus or panels that also control these attributes.
Depending on what is currently selected, the Property inspector displays information and settings for the current document, text, symbol, shape, bitmap, video, group, frame, or tool (see Figure 9). When two or more different types of objects are selected, the Property inspector displays the total number of objects selected.
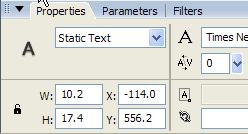
Figure 9. Property inspector showing the Text tool properties
To display the Property inspector, do one of the following:
- Select Window > Properties > Properties.
- Press Control+F3 (Windows) or Command+F3 (Macintosh).
About the Library Panel
The Library panel is where you store and organize symbols created in Flash, as well as imported files, including bitmap graphics, sound files, and video clips (see Figure 10). The Library panel lets you organize library items in folders, see how often an item is used in a document, and sort items by type. For more information, see “Managing Media Assets with the Library” in Using Flash.
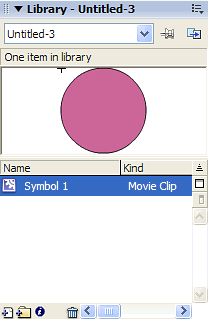
Figure 10. Library panel showing a movie clip symbol
To display the Library panel, do one of the following:
- Select Window > Library.
- Press Control+L (Windows) or Command+L (Macintosh).
About the Actions Panel
The Actions panel lets you create and edit ActionScript code for an object or frame (see Figure 11). Selecting a frame, button, or movie clip instance makes the Actions panel active. The Actions panel title changes to Button Actions, Movie Clip Actions, or Frame Actions, depending on what is selected.

Figure 11. Actions panel showing a stop() action in a frame
For information on using the Actions panel and writing ActionScript code, including switching between editing modes, see “Using the Actions Panel and Script Window” in Learning ActionScript 2.0 in Flash.
To display the Actions panel, do one of the following:
- Select Window > Actions.
- Press F9.
Using Panels
The various panels in Flash help you view, organize, and change elements in a document. The options available in panels control the characteristics of symbols, instances, colors, type, frames, and other elements. You can customize the Flash interface by displaying the panels you need for a specific task and hiding others.
Panels let you work with objects, colors, text, instances, frames, scenes, and entire documents. For example, you use the Color Mixer panel to create colors, and the Align panel to align objects to each other or the Stage. To view the complete list of panels available in Flash, see the Window menu.
Most panels include a pop-up menu with additional options. This pop-up menu is indicated by a control at the right end of the panel’s title bar. (If no pop-up menu control appears, there is no pop-up menu for that panel.)
By default, panels appear grouped at the bottom and at the right of the Flash workspace.
To open a panel:
- Select the desired panel from the Window menu.
To close a panel, do one of the following:
- Select the desired panel from the Window menu.
- Right-click (Windows) or Control-click (Macintosh) the panel’s title bar and select Close Panel Group from the context menu.
To use a panel’s pop-up menu (see Figure 12):
- Click the control at the far right in the panel’s title bar to view the pop-up menu.
- Click an item in the menu.
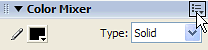
Figure 12. Clicking a panel’s pop-up menu
To resize a panel:
- Drag the panel’s border (Windows) or drag the size box at the panel’s lower-right corner (Macintosh).
To expand or collapse a panel to its title bar (see Figure 13):
- Click the collapse arrow in the title bar. Click the collapse arrow again to expand the panel to its previous size.
![]()
Figure 13. Clicking a panel’s collapse arrow
To close all panels:
- Select Window > Hide Panels.
Arranging Panels
In Flash, you can organize panels into groups. You can rearrange the order in which panels appear within panel groups. You can also create new panel groups and dock panels to existing panel groups. If you want a panel to appear on its own, separated from other panel groups, you can float the panel. This is particularly useful for panels that you want access to all the time, for example, the Help panel or the Actions panel.
To move a panel:
- Drag the panel by its gripper, on the left side of the title bar (see Figure 14).
![]()
Figure 14. Gripper
To add a panel to an existing panel group:
- Drag the panel by its gripper onto another panel. A black line appears next to the target panel to show where the panel will be placed.
To display multiple panels in a single panel window:
- Click a panel’s pop-up menu.
- Select the Group Panel Name With option.
- Select another panel to add the current panel to from the submenu.
The first panel is added as a tab to the second panel (see Figure 15).
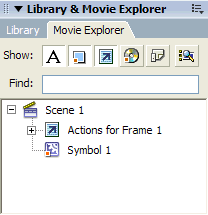
Figure 15. Tabbed panel showing the Library and Movie Explorer panels
To float a panel:
- Drag the panel by its gripper and move it away from other panels.
To create a new panel group:
- Drag the panel by its gripper, away from other panel groups. Add additional panels to the first panel to form a new group.
Using Panel Sets
You can create custom panel arrangements, and save these as custom panel sets. You can switch the panel display to the default layout (displaying the Color Mixer, Actions, Property inspector and Library panels) or to a custom layout that you have saved previously.
To save a custom panel set:
- Select Window > Save Current.
- Enter a name for the layout and click OK.
To select a panel layout:
- Select Window > Workspace Layout.
- From the submenu, select Default Layout to reset panels to the default layout, or select a custom layout that you have saved previously.
To delete custom layouts:
- Select Window > Workspace Layout > Manage.
- In the Manage Workspace Layouts dialog box, select the panel set you want to delete.
- Click Delete.
- Click Yes to confirm the deletion.
- Click OK.
Comments