
Easter gifts
Make a copy of the layer with the grass and select then the Free Transform option to turn over the copy, positioning it above the layers containing the Easter eggs. Choose the Free Transform (warp) solution to change the layer’s perspective.
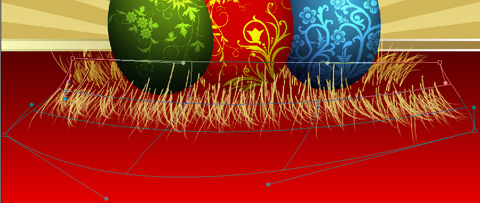
Make several copies of the new layer we’ve got and choose again Free Transform option to turn over the copies for representing the nest the eggs will be situated in. This operation needs applying the Burn Tool (O) and the Dodge Tool (O) for darkening out the layers or lighting them too to get a more real effect.

For getting the best result, it’s necessary to combine in a group all the nest’s layers, placed above the eggs’ layers (press CTRL button to mark out the corresponding layers and then hold on the left mouse’s button to take the marked layers on Create a new group solution). Put together the group’s elements (CTRL+E) and apply the Free Transform option to give the new layer a rounder shape.


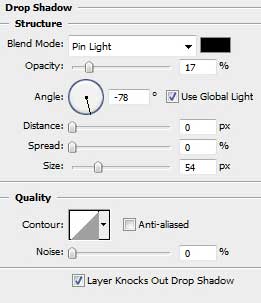
The layer’s parameters: Blending Options>Drop Shadow

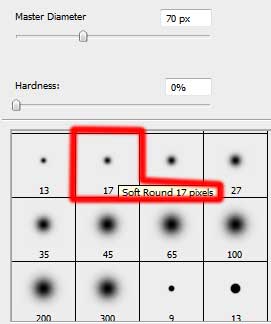
Take the Ellipse Tool (U) to draw a lot of small white circles.

Using the same tool, try to make several more circles, colored with #B58B41

Choose the Pen Tool (P) this time to draw a radial star of white color too.

The new star’s layer needs to be copied four times and then applying Free Transform solution we need to change the copies’ sizes and their inclination direction.

Create a new layer for using on it the Brush Tool (B) (Opacity of 20%) of white color to draw the stars’ illumination.

The Easter picture is finished!
View full size here.
Comments