
Designing with CSS – Part 3: Creating the Banner Graphic
Creating the Banner Graphic
First create the image for your banner:
- Open Fireworks 8.
- Create a blank canvas 770 pixels wide by 100 pixels tall.
- Select the Rectangle tool from the Tools panel
- Draw a rectangle that completely covers your canvas
- Give it a color value of #212A51.
- Open the car image in Fireworks 8 and select it.
- Copy the car image.
-
Paste it onto your newly created canvas and position it on the right side (see Figure 5).

Figure 5. The banner image
- Click the car image to select it.
-
Choose Commands > Creative > Fade Image to open the Fade Image dialog box (see Figure 6).
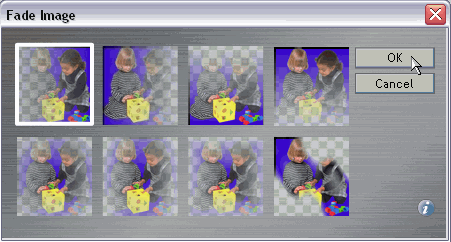

Figure 6. The fade image options
- Select the top-left option, as shown, and click OK.
Your banner should now show the fade effect applied to the car image (see Figure 7).

Figure 7. The banner image with the fade command applied
You are now ready to add some text to the banner. Let’s do this in Fireworks:
- Select the Text tool from the Tools panel and click on the canvas—anywhere will do.
- Double-click the Text tool in the Tools panel to open the Text Editor.
-
Enter the text shown in Figure 8 and click OK.
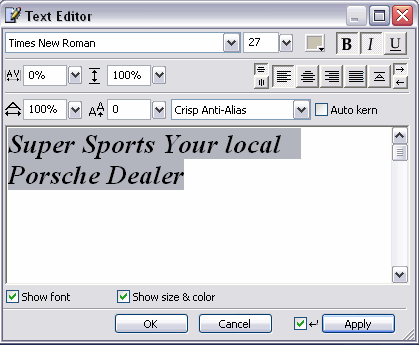
Figure 8. Adding the text to your banner
- To add a motion effect to the text, click the text area and select Filters > Eye Candy 4000 LE > Motion Trail. (Click OK in the warning dialog box that says this effect converts vectors to bitmaps.)
-
In the Motion Trail dialog box, complete the settings as shown in Figure 9.
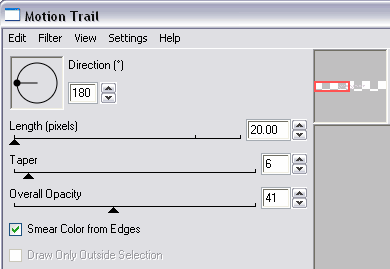
Figure 9. Setting the properties for the motion trail
-
Click OK to complete the text on the banner (see Figure 10).

Figure 10. The motion effect has been added to the text
- Select File > Export Preview.
-
In the Export Preview dialog box set the image type to JPEG and set the compression to 68 (see Figure 11).
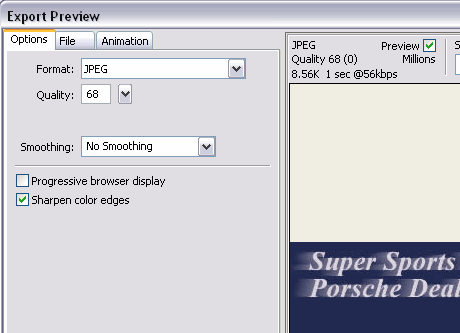
Figure 11. Exporting the banner image
- Once you are happy with your settings, click the Export button to export the image to your local site.
Now you are ready to create the banner div in the CSS file and then add the code for it in the XHTML document.
Comments