
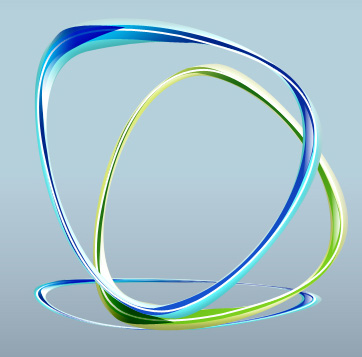
Design Business Forms
The layer’s parameters: Fill 0%
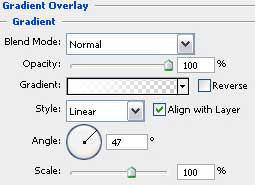
Blending Options>Gradient Overlay 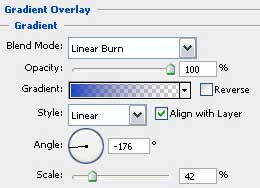
Gradient’s parameters: 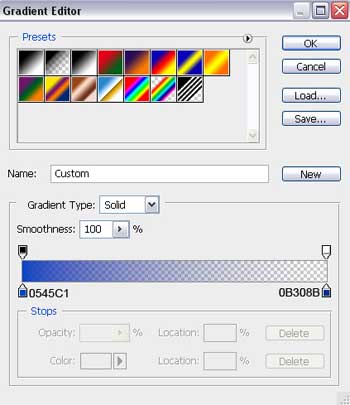
Select again the same instrument mentioned above to represent another flare on the top part of the frame.
The layer’s parameters: Fill 0%
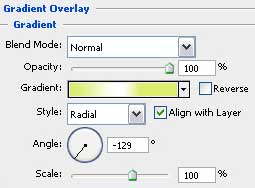
Blending Options>Gradient Overlay

Gradient’s parameters:


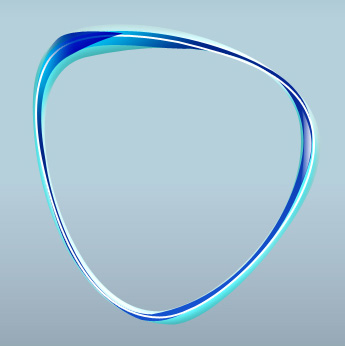
Combine in a group all the layers composing the circle frame (press Ctrl button to mark out the corresponding layers and next we have to hold on the left mouse’s button for taking the marked layers on Create a new group option).
Next make a copy of all the layers contained in the circle’s group (press again Ctrl button to mark out the necessary layers and hold on the left mouse’s button for taking the marked layers on Create a new layer selection).
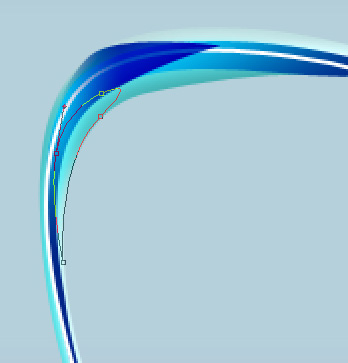
Merge Down all the layers (press Ctrl button to mark out the layers and press the combination of buttons Ctrl+E). Using Free Transform option it’s possible to change a little the new element that we got, placing it as below:

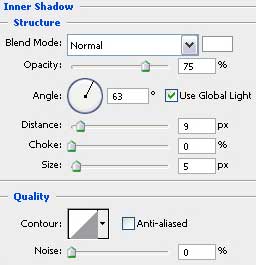
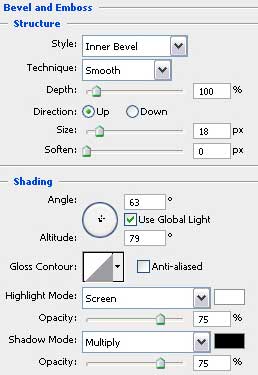
Make a copy of the earlier made group containing the blue circle. Use again the Free Transform option (Flip Vertical) to turn around the copy, making it a little smaller (by pressing SHIFT button). We should also apply different parameters for the layers.
The parameters for the first layer: Blending Options>Inner Shadow
Blending Options>Bevel and Emboss
Blending Options>Gradient Overlay
Comments