
Creating an FLV File with the Video Import Wizard
Creating an FLV File with the Video Import Wizard
Now that you have created the video, here is how to create the FLV using the Video Import Wizard in Flash Professional 8:
- Open a new Flash Professional 8 document and select File > Import > Import Video to open the Video Import wizard. When the Select Video dialog box opens, click the Browse button and navigate to your talking-head video. When you open it, click the Next button to get to the Deployment screen. You are essentially being asked how the video will play in Flash Player 8.
-
Select the Progressive Download From a Web Server option and click Next to open the Encoding screen.
This screen is where you create the FLV file that contains the alpha channel (see Figure 17). There are a few rules to follow regarding Flash Professional 8 and FLV files with alpha channels:
- Choose one of the Flash 8 Profiles. The default is Medium Quality, which pegs the data rate for the FLV at 400 kbps and uses the On2 VP6 codec.
- Alpha channels can be added to FLV files only if they use the On2 VP6 codec. Even though this is the default codec for the encoder, don’t click Next just yet.
-
You must explicitly tell Flash Professional 8 to include the alpha channel in the Advanced Settings area of the Flash Video Encoder.
-
Click the Show Advanced Settings button to reveal the advanced settings. Select the Encode Alpha Channel option located under the Video Codec pop-up menu (see Figure 18).
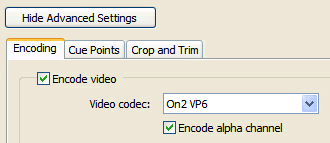
Figure 18. Selecting the Encode Alpha Channel option in the Advanced Settings area of the Flash Video Encoder.
-
Click Next to open the Skinning screen. Select None (this is a simple talking head, after all) and click Next.
Note: These skins are your playback controls. The list contains 27 possible control styles that you can apply to your video. Choosing None (which I do here) assumes that the video will automatically play and that the user will have no control over that decision. I chose None simply because I wanted to see if the technique works.
The other skins are self-explanatory. They fall into two categories: controls that sit on top of the video and controls that sit under the video. Skins that sit on top of the video become visible when the user moves the cursor over the video at runtime, while those that sit under the video contain “External” in the skin name. When you choose a skin style, you will see it previewed. Just be aware that you need to leave about 35 pixels of space on the Stage under the video component to accommodate external skin styles. If you don’t do this, the skin will either be cut off or not appear at all. This is because all skins are external SWF files.
After you apply a skin style, the skin’s SWF is copied from your Flash application folder to the same folder as the SWF containing the video. You must upload both the SWF containing the video and the SWF containing the skin to the web server.
-
The next screen that appears asks you to determine where the files will be saved. Click Finish to open the Save As dialog box. Enter a name for the FLA file (the FLV will be given the same name) and click Save.
You will been shown the progress of the FLV creation (see Figure 19). After the FLV is created, the Flash Video Encoding Progress dialog box closes and you are returned to the Stage, where an FLVPlayback component is visible.
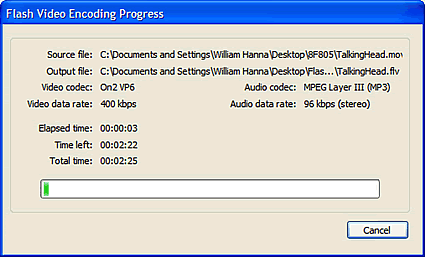
Figure 19. Progress of the FLV encoding process
- To see if your mask “takes,” add a new layer under the video and place an image in this new layer. I used a graphic from Community MX in Figure 20. Content placed below a video containing an alpha channel will become visible.
-
Save the file and press Control+Enter (Windows) or Command+Return (Mac OS) to preview your talking-head video (see Figure 20).

Figure 20. Tom the talking head
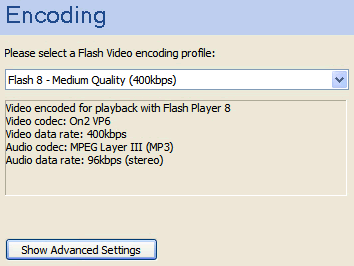
Figure 17. All Flash 8 profiles use the On2 VP6 codec, which is required to include an alpha channel in Flash video

Congratulations! You’ve created a Flash video file with an alpha channel that can show whatever image you want behind the talking head.
Comments