
Create a Colorful Composition using Brushes in Photoshop
Paint with this brush as show using the next colors for Chalk 44 brush – #9E1115, #498ECB. For Sampled brush 2 10 – white color (Opacity 10%). The layer will be situated also lower than the layer containing the man.
Set the Blending mode to Linear Burn for this layer.
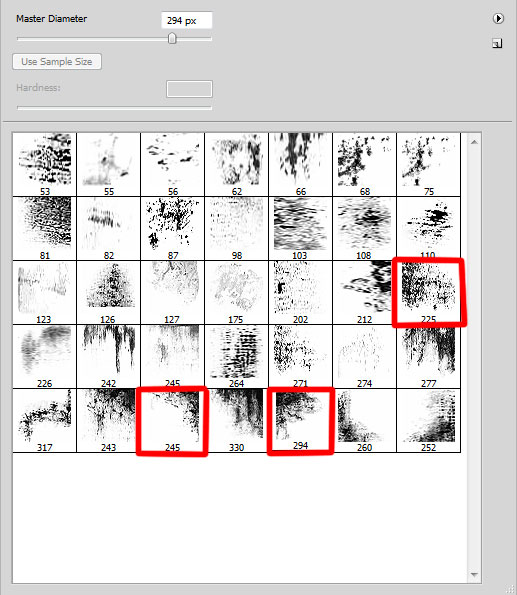
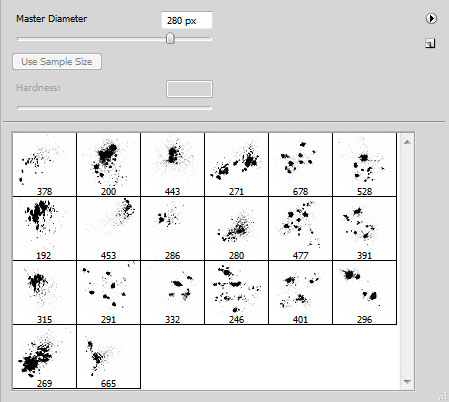
Create another new layer and use the next brushes from the earlier used set of brushes.
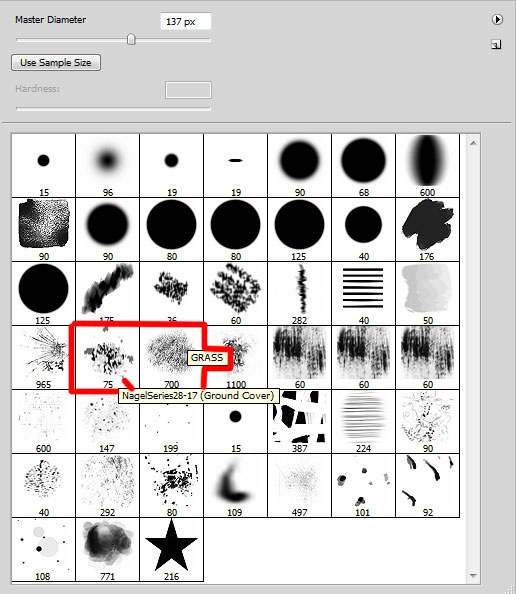

Paint with NagelSeries28-17 and GRASS brushes as shown using the #FDC689 (Opacity 60%) color. The layer will be situated under the man’s layer.
Set the Blending mode to Hard Mix for this layer.
We have to represent a new layer and use on it the recently applied brushes. On the background’s right side we’ll paint with white color. On the man’s left side we’ll paint with #EBC7E2 color for the background. Place the layer under the man’s layer.
Create a new layer and choose the next brushes from grunge_brushes_by_szuia set. The brushes’ color is #F0E2EB.
Paint with these brushes as shown. The layer will be situated lower than the man’s layer.
On the next new layer we’ll apply the next brushes from spooky_splats set.
Their color is black. Place this layer under the man’s layer and make some brushstroke using these brushes.
Set the Blending mode to Overlay for this layer.
Next we’ll use again the earlier mentioned brushes of black color and place the layer under the man’s layer.

Create a new layer and choose again the brushes from spooky_splats set. Foreground color is white this time. Place this layer under the man’s layer too.
Set Fill to 74% for this layer in Layers panel.
Now we have to represent a new layer and make some brushstroke with the earlier mentioned set of brushes. Their colors are: #D53B80, #EBD584, #AEA932, #6DCFF6.The layer needs to be placed also under the man’s layer.
Create a new layer and choose again the brushes from spooky_splats set. The color is #C783AB. Place this layer under the man’s layer and make some brushstroke as shown:
Set the Blending mode to Hard Light for this layer.
Create a new layer and select the same brushes from earlier applied set.

Paint with these brushes using the next colors: white, #A29825 and #7DA7D9. Place this layer under the man’s layer.
Set the Blending mode to Darker Color for this layer.
Create a new layer and select the next brush from MVbrush0809 set.
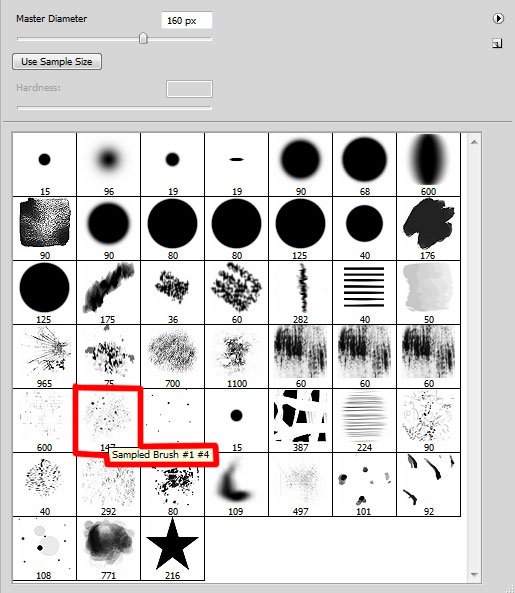
Paint with Sampled Brush #1 #4 using the next colors: #CF66A6, #788097, #F7B2D0 and white. Place this layer under the man’s layer.
Create a new layer and paint here with the above mentioned brush using the next colors: #A19EC7, #AEA0A7. Place this layer lower than the man’s layer.

Set the Blending mode to Darken for this layer.
Create a new layer and paint here with the earlier mentioned brush, applied before. The brush’s color is #93888F. Place the layer under the man’s one.
Set Fill to 71% for this layer and change the Blending mode to Screen. Add the next Drop Shadow settings for the layer by clicking on Add a layer style icon from bottom part of the Layers panel

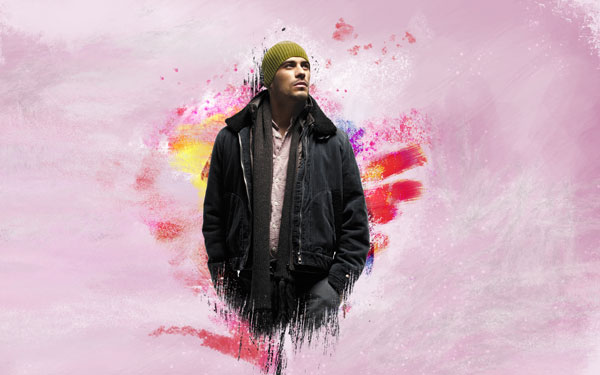
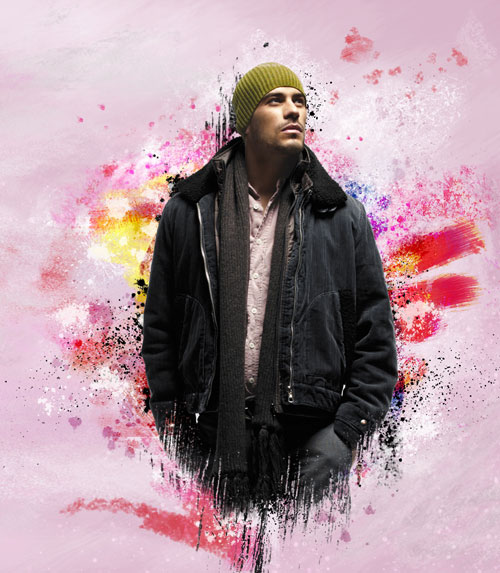
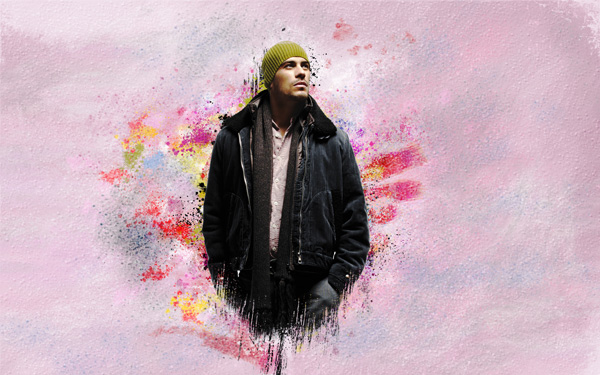
We’ve got the next effect on the layer.

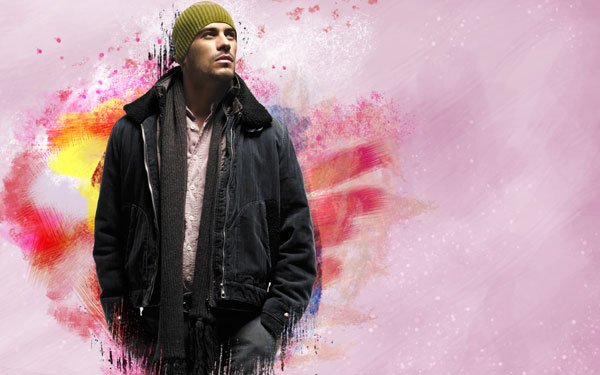
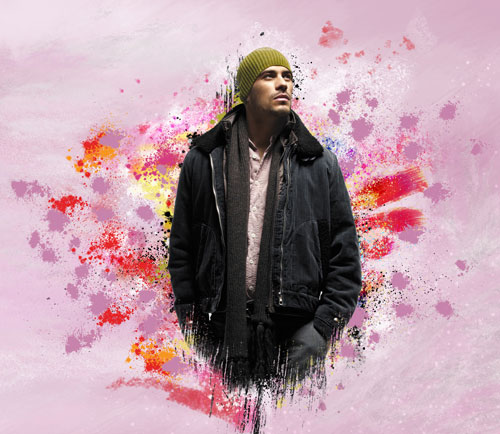
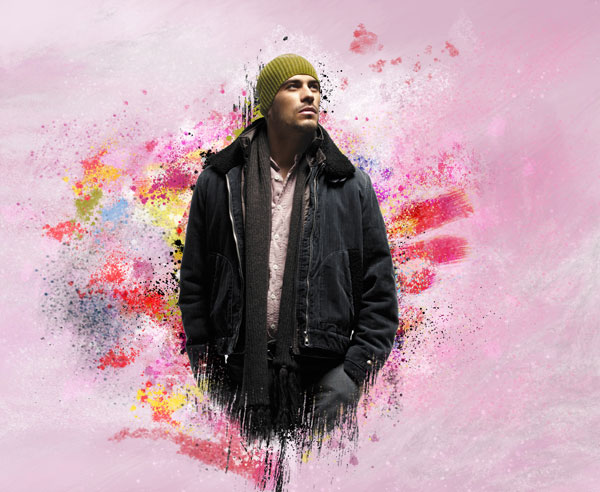
Select Create new fill or adjustment layer from bottom part of the Layers panel and click to Curves to adjust the curve shape as shown to make some little color corrections.

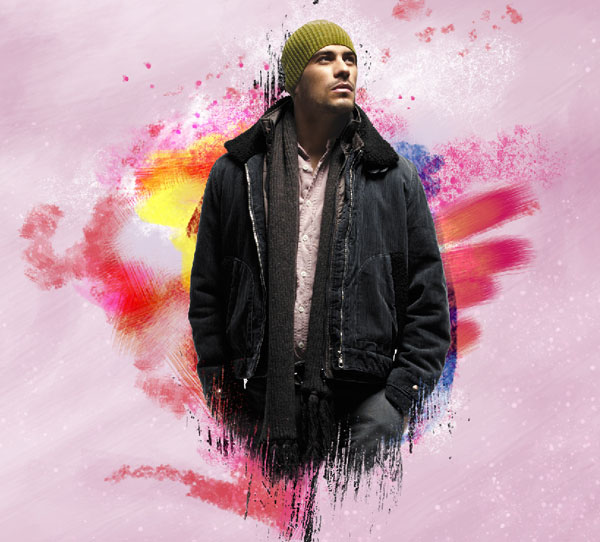
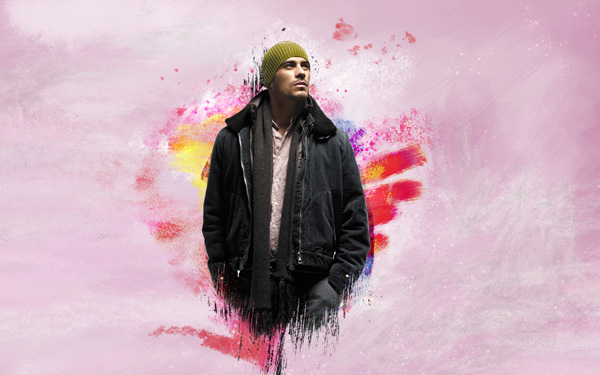
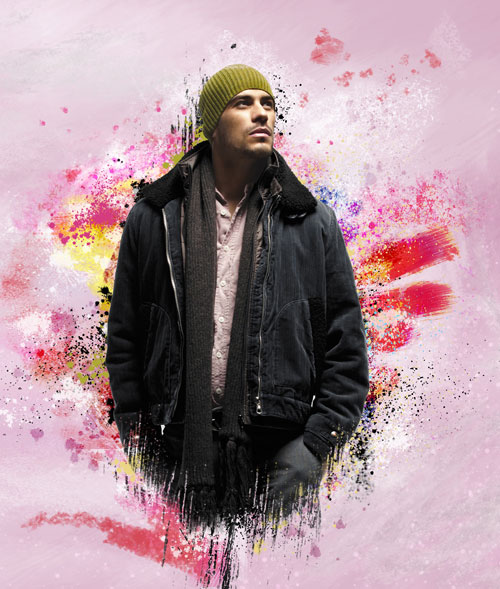
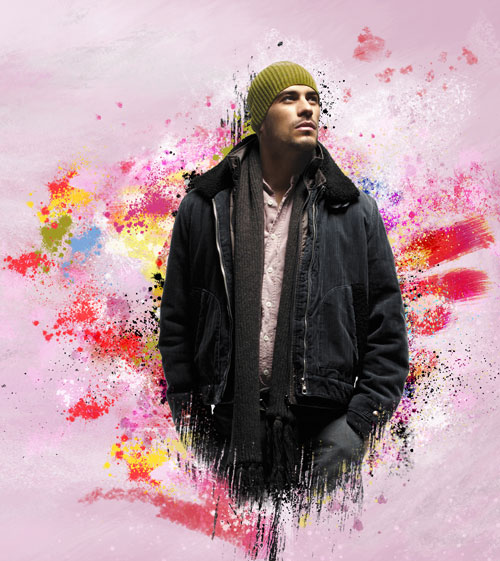
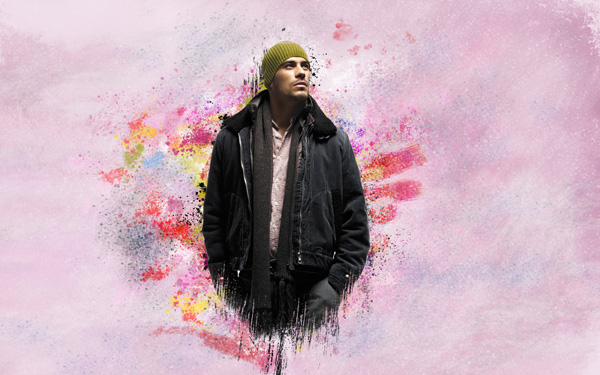
We’ve got the next result:
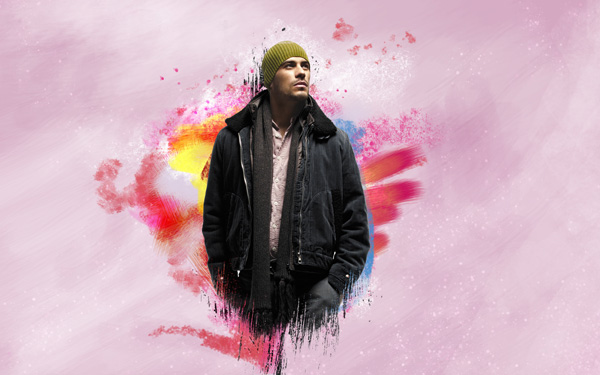
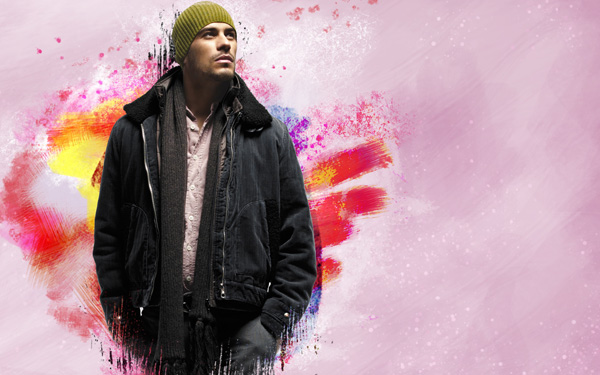
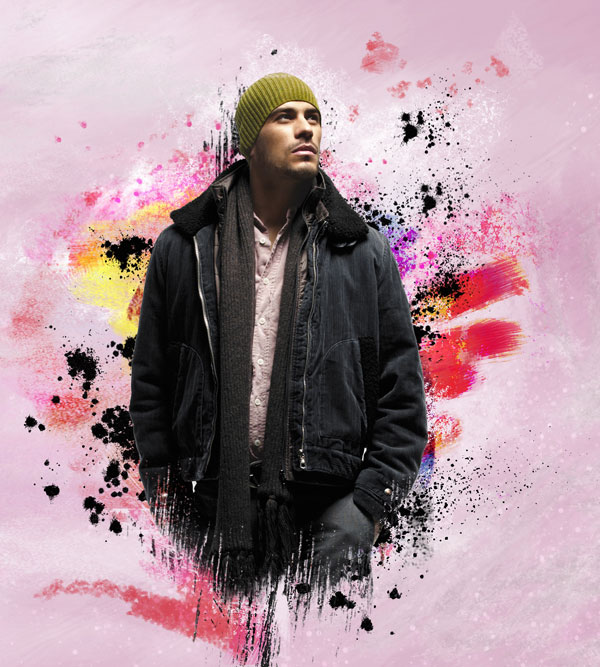
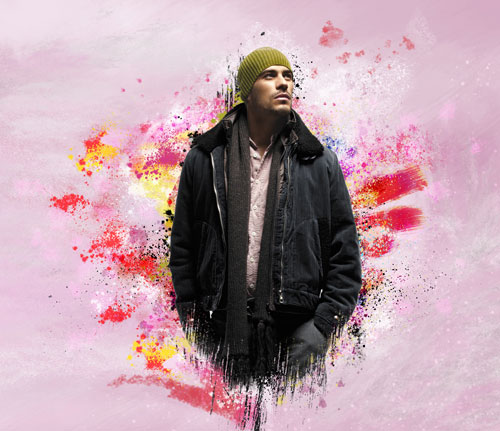
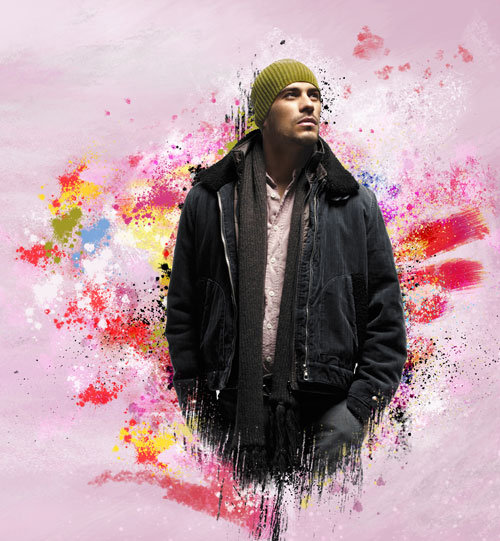
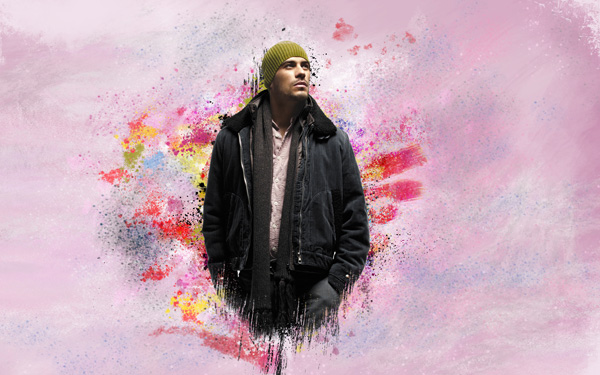
The final result!
View full size here.
Download free Layered PSD file.
Page: 1 2
Comments