
How to Create Christmas Greeting Card with colorful stars and baubles in Photoshop CS5
Make a copy of the very first star’s layer and select the Free Transform (Ctrl+T) command to make the copy’s layer smaller.

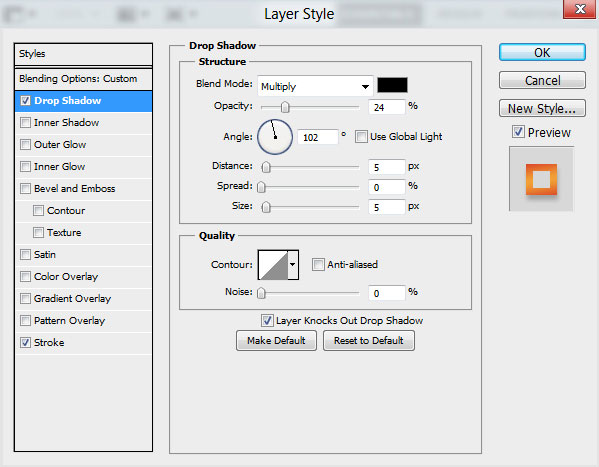
Set Fill to 0% for this layer and click on Add a layer style icon from bottom part of the Layers panel to select Drop Shadow.
Add Stroke:
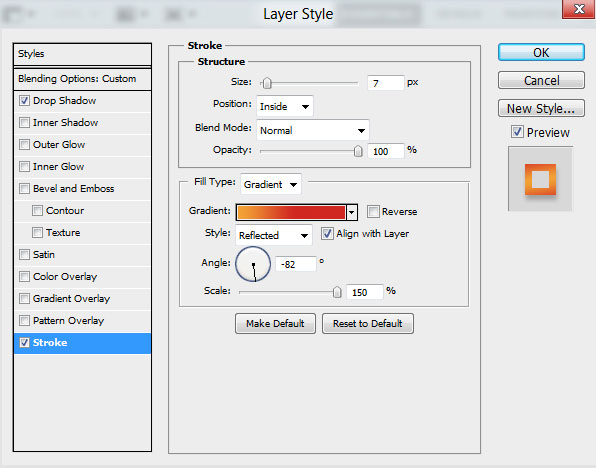

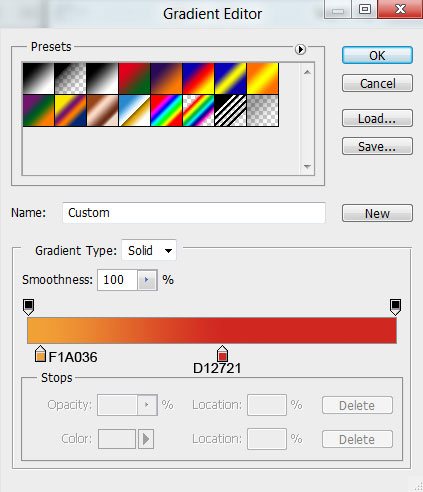
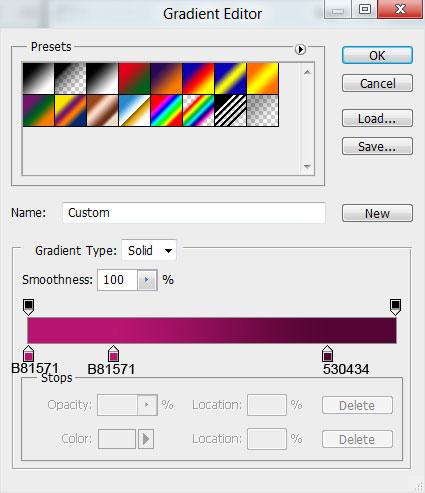
Select Fill Type – Gradient and click in the color bar to open the Gradient Editor, set the color stops as shown. Click OK to close the Gradient Editor dialog box.
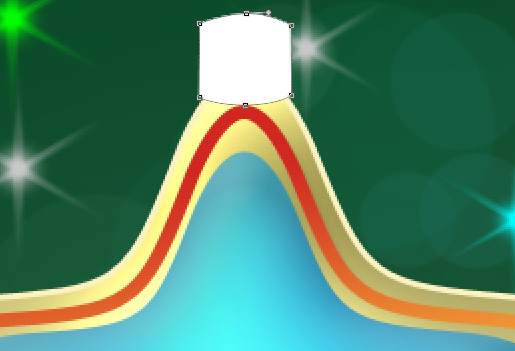
We’ve got the next result:

Next we have to draw the star’s support element, choose the Pen Tool (P), set the drawing mode on Shape Layers in Options bar and draw the next shape as shown.
Click on Add a layer style icon from bottom part of the Layers panel and select Gradient Overlay.
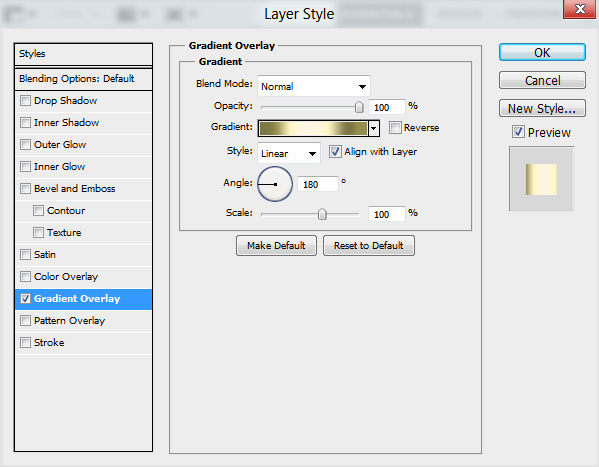
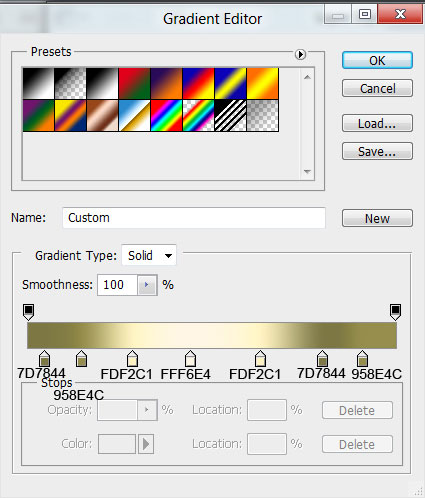
Click in the color bar to open the Gradient Editor and set the color stops as shown. Click OK to close the Gradient Editor dialog box.
We’ve got the next result:

Using the Ellipse Tool (U), we may represent the ring, placing the layer under the support’s element layer.

Set Fill to 0% for this layer and click on Add a layer style icon from bottom part of the Layers panel to select Stroke.
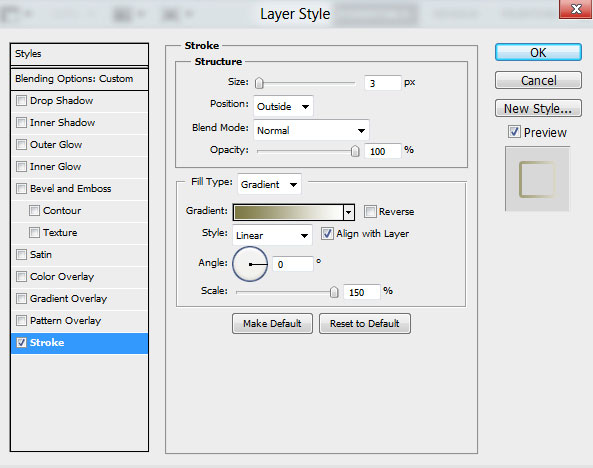
Select Fill Type – Gradient and click in the color bar to open the Gradient Editor, set the color stops as shown. Click OK to close the Gradient Editor dialog box.

We’ve got the next result:

Now our first star was drawing.

Combine in a group all the layers composing the star and the support element with the ring (press CTRL button to select the necessary layers and hold on the left mouse’s button while dragging the selected layers on Create a new group icon from bottom part of the Layers panel).
Make three copies of the made group and make changes in the copies’ styles on the layer with the blue star. Change the original color on three other colors.
The red color (the layer’s color #EB5738).
Click on Add a layer style icon from bottom part of the Layers panel and select Inner Shadow.

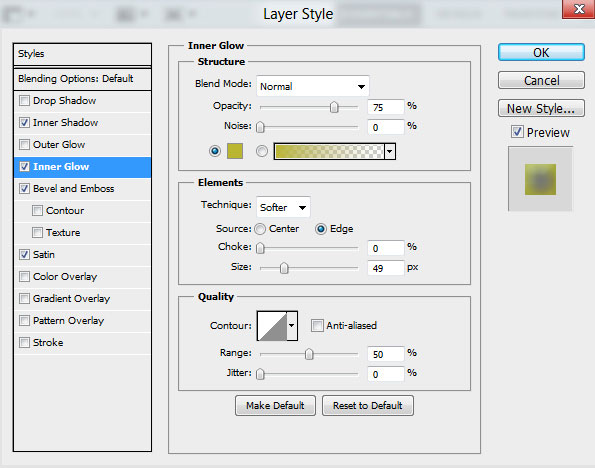
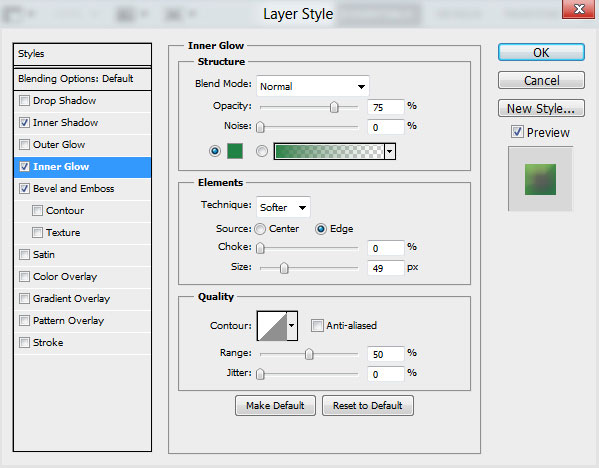
Inner Glow settings:
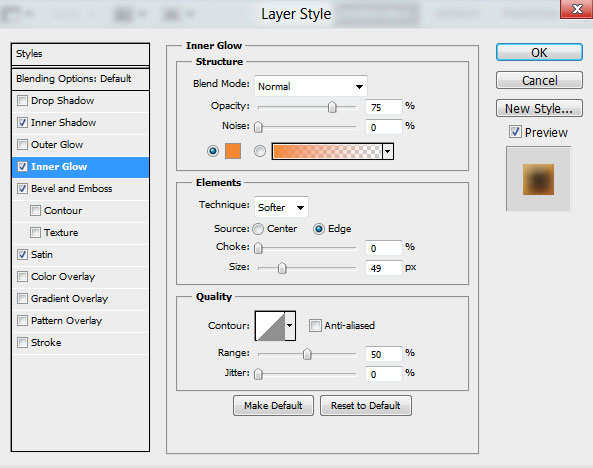
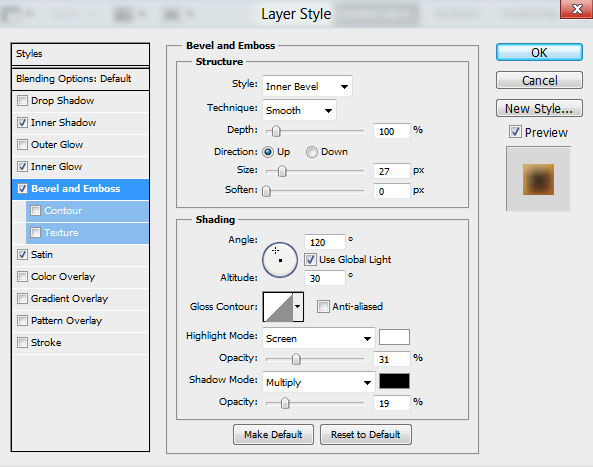
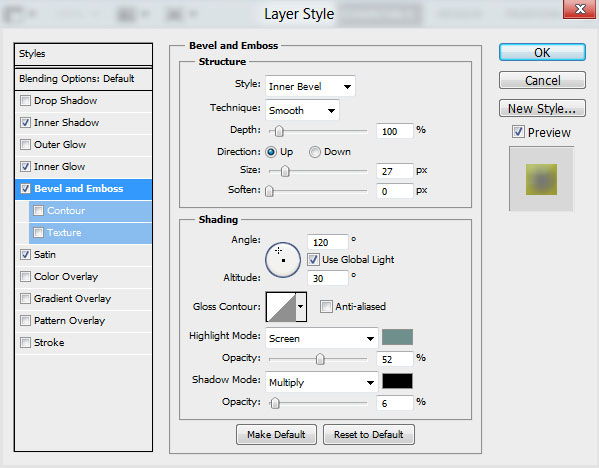
Bevel and Emboss settings:
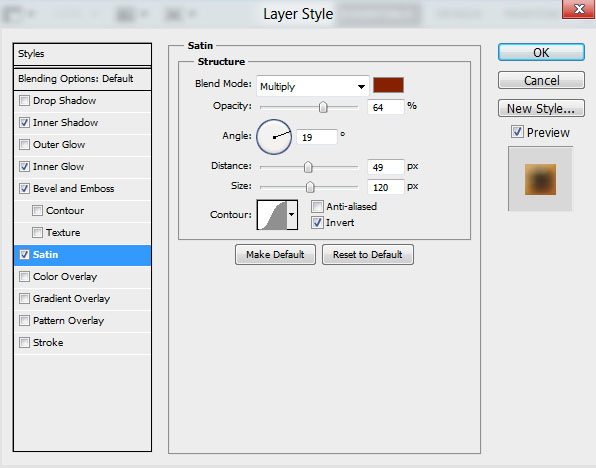
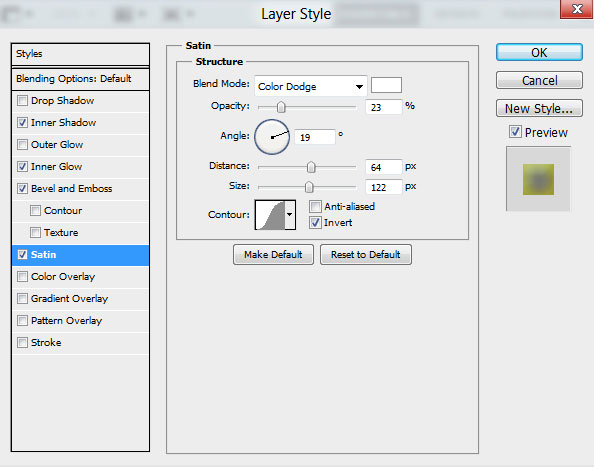
Satin settings:
We’ve got the next result:

The yellow color (the layer’s color #FFE155).
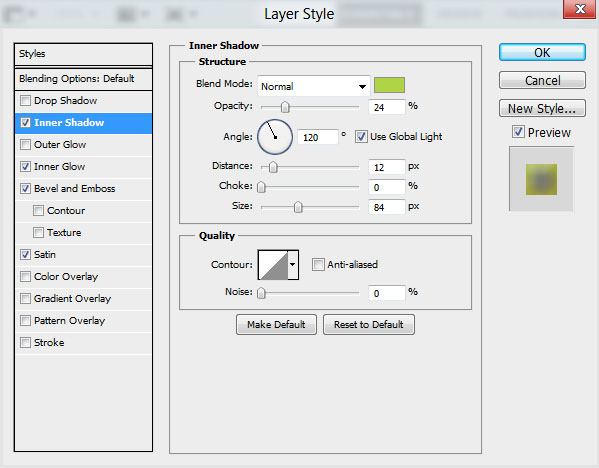
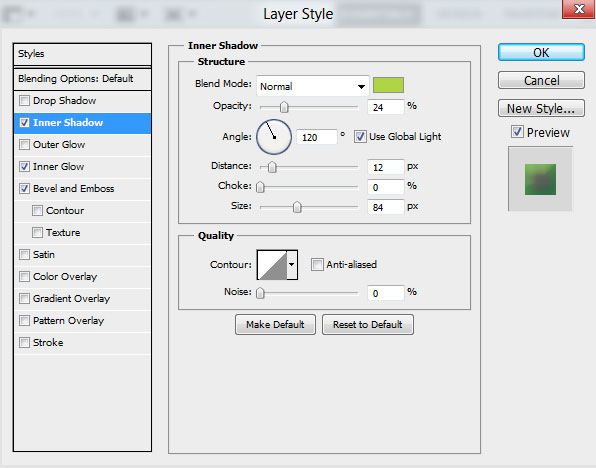
Inner Shadow settings:
Inner Glow settings:
Bevel and Emboss settings:
Satin settings:
We’ve got the next result:

The green color (the layer’s color #71C04C).
Inner Shadow settings:
Inner Glow settings:
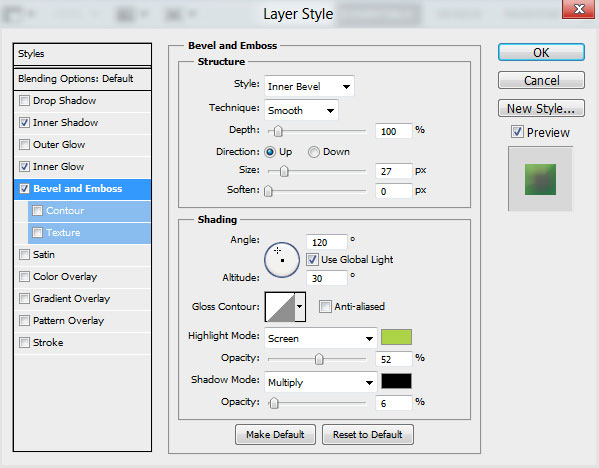
Bevel and Emboss settings:
We’ve got the next result:

Now our colorful stars was drawing:

Using the Free Transform (Ctrl+T) command we can change the copies’ sizes, placing them as it is shown on the next picture. If necessary we can make copies of the stars.

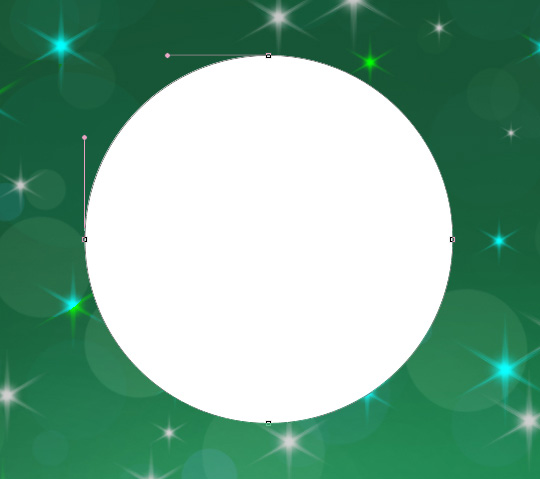
Using the Ellipse Tool (U), we can represent now a Christmas bauble. Select Ellipse Tool (U) and draw the next ellipse:
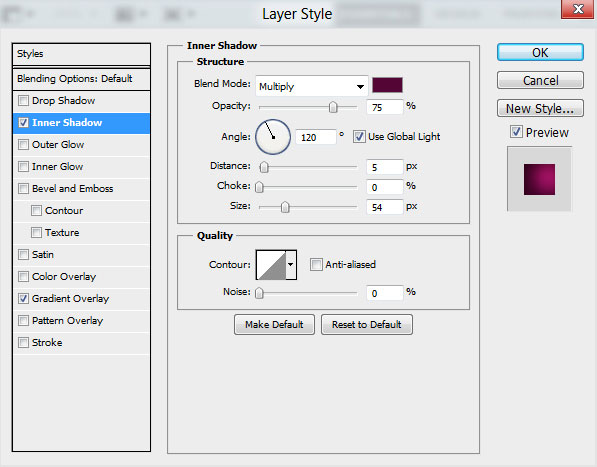
Click on Add a layer style icon from bottom part of the Layers panel and select Inner Shadow.
Apply Gradient Overlay:
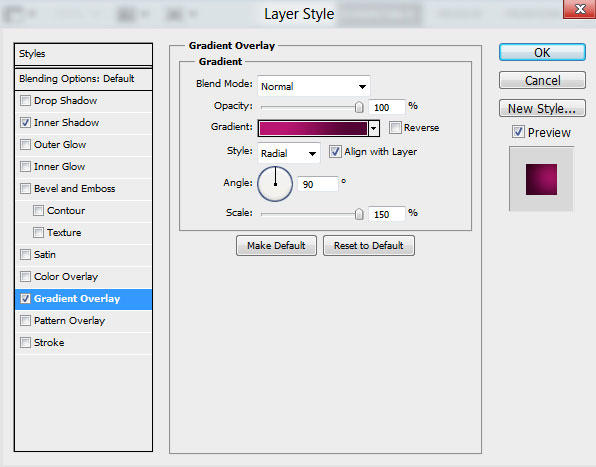
Click in the color bar to open the Gradient Editor and set the color stops as shown. Click OK to close the Gradient Editor dialog box.
We’ve got the next result:


Comments