

Create a Dark Photo Manipulation of a Young Witch in a Forest
Step 10
To match the color of the hat and the dress bottom with the sock I used a Hue/Saturation adjustment layer with the Clipping Mask Option:

Step 11
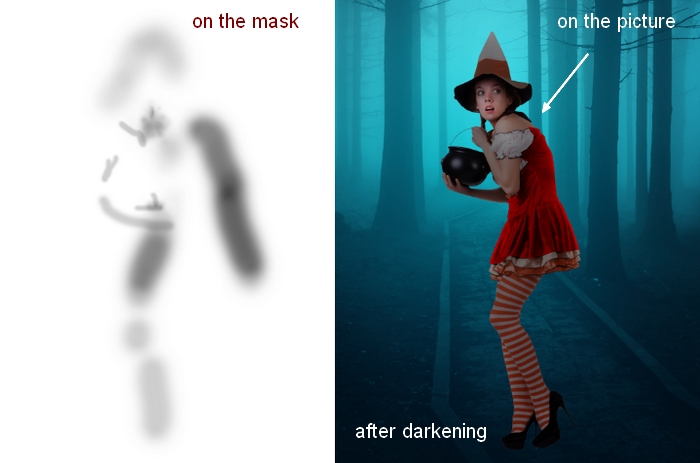
I used a Curves adjustment layer to darken the model:

On this layer mask use a soft black brush to reduce the dark on the some parts of the model as shown below:

Step 12
Use a Color Balance adjustment layer to add some cyan to the model:


Step 13
I used a Photo Filter adjustment layer to add more dark cyan to her:

On this layer mask use a soft black brush to reduce the cyan on the dress:


Step 14
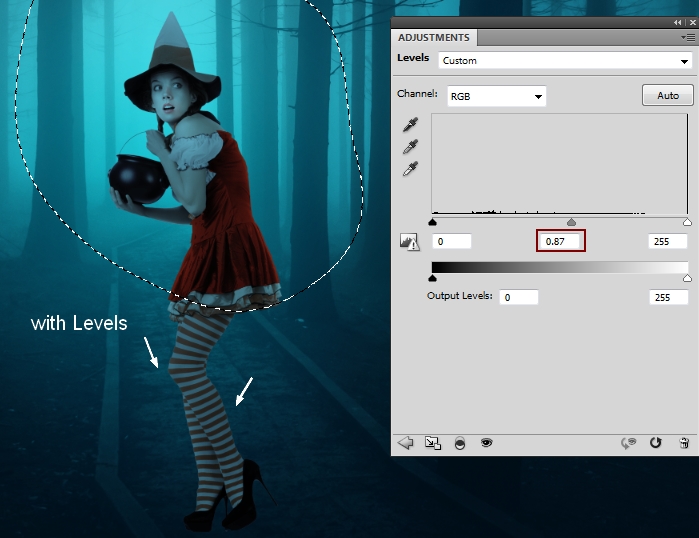
I used a Levels adjustment layer to darken the legs and erase the higher part of the model on this layer mask:
Step 15
Make a new layer (Clipping Mask), change the mode to Overlay 100% and fill with 50% gray:

Active the Dodge and Burn Tool (O) with Midtones Range, Exposure about 10% to add some shade and light to the legs and hat. You can see how I did it with the Normal mode and the result with the Overlay mode:

Step 16
To add some misty effect to the model I made a new layer, used a soft brush with the color #20a6bd to paint on the hat and the model back. Lower the opacity of this layer to 50%:

Step 17
On a new layer, use the same brush but with the smaller size (about 5-6 px) to paint the rim light for the model . I’ve used a tablet pen to do it but you can do it with the mouse:

Step 18
Make a new layer under the model one. Use a soft black brush with the opacity about 50% to paint the shadow under the model shoes:

Step 19
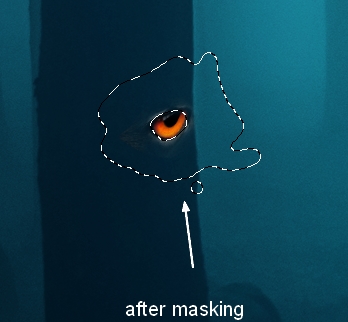
Open the eye 1 image. Use the Lasso Tool (L) to select an eye and position it at a tree on the left, use the Warp Tool (Edit > Transform > Warp) to tweak it :


Click the second button at the bottom of the Layers Panel to add a mask to this layer. Use a soft black brush to remove the hard edges and blend the eye with the tree:
Jenny Le
Self-taught artist from Vietnam who loves drawing and doing photo manipulation. See more of my work at http://jennyle88.deviantart.com/
Comments