
Christmas ornament balls
Next we have to picture that small wire circle that represents the place, belonging to the thread the ball decoration hangs up with. In this case we’ll select the Ellipse Tool (U). The new layer should be placed lower than the previous layer on the layers’ panel:
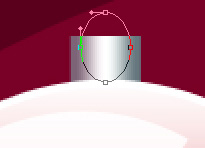
The layer’s parameters: Fill 0%
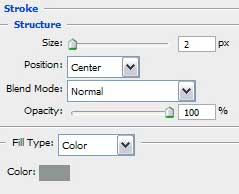
Blending Options>Stroke

Take the Line Tool (U) and let’s picture out the thread the decoration hangs up with. The color for the new element is #315064


Next we shall combine in a group all the layers containing the ball decoration with its ornament and the stars inside (press Ctrl button to mark out the corresponding layers and hold on left mouse’s button while moving the marked layers on Create a new group option). Make a copy of the last made group and select Free Transform option to enlarge the copy, placing it the way represented next picture:

Next we should decorate the picture with small circles of white color, applying the Ellipse Tool (U).


Use the last applied tool for representing several more small circles, colored with #DFA5B7

Combine in a group all the layers composing the small circles (press Ctrl button for marking out the appropriate layers and hold on left mouse’s button while taking the marked layers on Create a new group option). Set the next demonstrated parameters for the new group: Opacity 10%

Using the same Ellipse Tool (U), we may represent once again several small circles of white color:

We shall apply the described method above for merging down in a group the new made white circles: Apply the next demonstrated parameters for the new represented group of circles: Opacity 50%
Blending mode-Overlay

The picture is finished!
View full size here.
Comments