
Christmas Design in Adobe Photoshop CS6 – Red and Gold Christmas Ball on Stars Background
Using the Ellipse Tool (U), we’ll represent a small ring on the support. For the beginning we’ll draw the first ellipse. Press Alt button or select Subtract from shape area (-) from Options bar and draw another ellipse to cut the middle part of the ring as shown. Place the layer under the layers containing the ball and its support element.

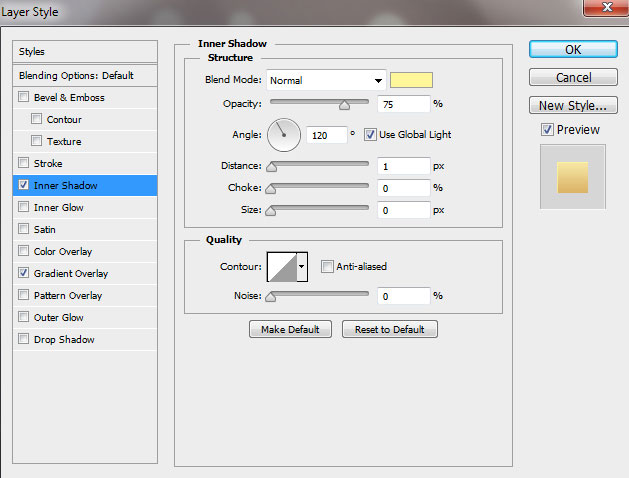
Click on Add a layer style icon from bottom part of the Layers panel and select Inner Shadow.
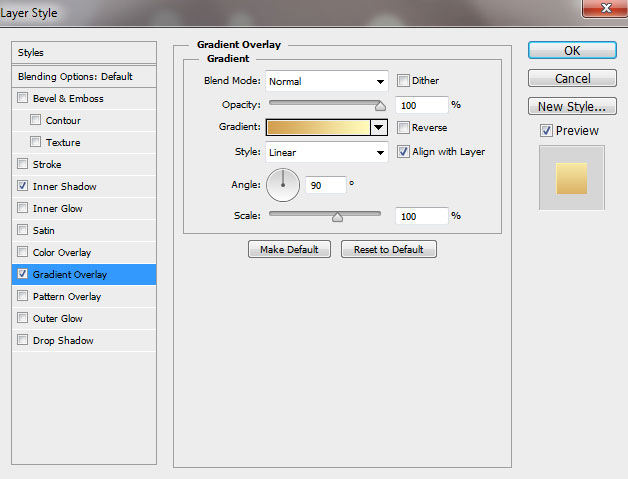
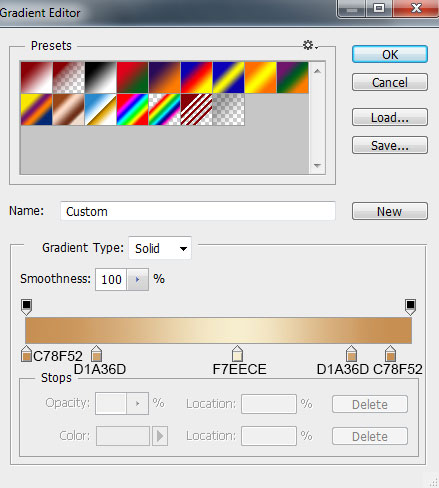
Apply Gradient Overlay:

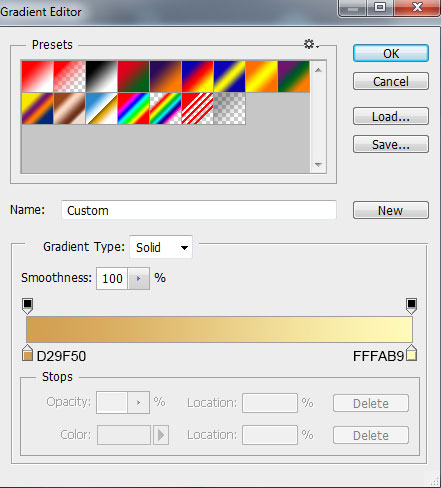
Click in the color bar to open the Gradient Editor and set the color stops as shown. Click OK to close the Gradient Editor dialog box.
We’ve got the next result:

Our Christmas Ball is finished:

Combine in a group all the layers composing the Christmas ball and its support element with the ring on it (press CTRL button to select the necessary layers and hold on the left mouse’s button while dragging the selected layers on Create a new group icon from bottom part of the Layers panel).
Make a copy of the got group and rasterize the group’s copy by selecting the group in Layers panel and then pressing CTRL+E to Merge Down.
The rasterized layer needs to be smaller and placed it like below, choosing the Free Transform (Ctrl+T) command for this operation.

Then we’ll make copy of the very first represented Christmas ball’s group. Remove the layer containing the darkening around the ball out of the group’s copy and change the layer’s style.
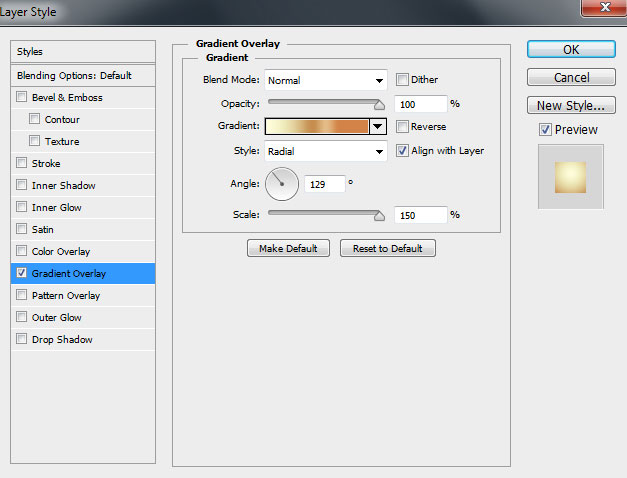
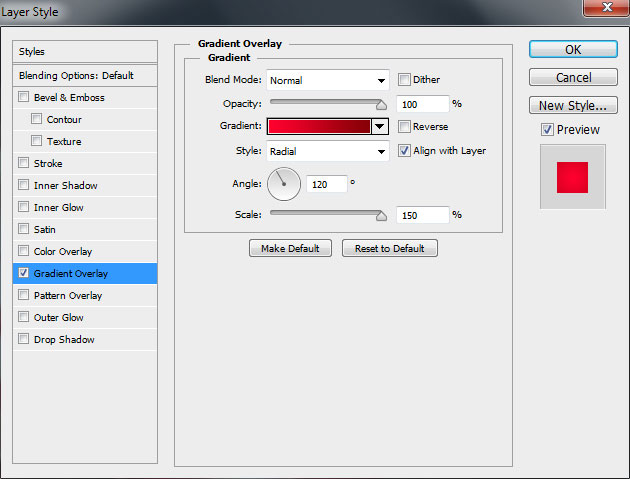
Click on Add a layer style icon from bottom part of the Layers panel and select Gradient Overlay for the ball’s layer.
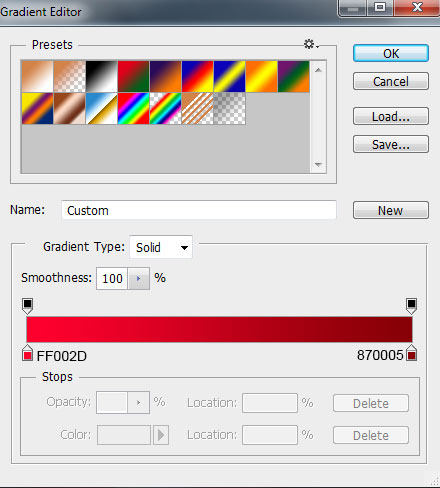
Click in the color bar to open the Gradient Editor and set the color stops as shown. Click OK to close the Gradient Editor dialog box.
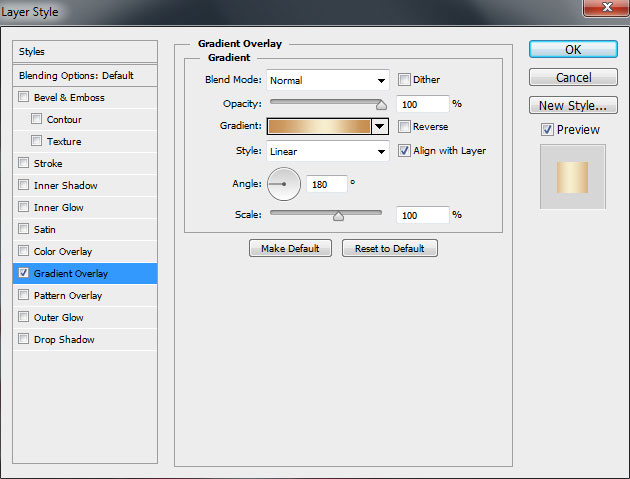
Next apply the Gradient Overlay on the layer containing the stars.
Click in the color bar to open the Gradient Editor and set the color stops as shown. Click OK to close the Gradient Editor dialog box.
Apply the Gradient Overlay for the layer containing the support element on the ball:
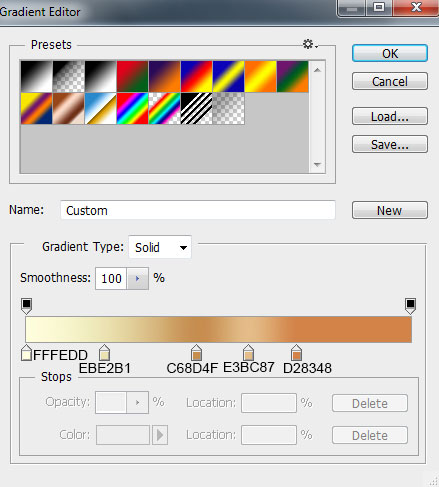
Click in the color bar to open the Gradient Editor and set the color stops as shown. Click OK to close the Gradient Editor dialog box.
We’ve got the next result:

The changed group’s copy must be put into a rasterized layer the same way described earlier. Using the Free Transform (Ctrl+T) command we should make smaller the rasterized layer of the got ball and place it the way from below:

Make a copy of the last made layer and select the Free Transform (Ctrl+T) command to make smaller the copy’s sizes and place it the same way shown on the picture. Place the layer under the group with the red Christmas ball.

Next we’ll draw the thread for the ball, choose the Pen Tool (P), set the drawing mode on Shape Layers in Options bar and draw the next vertical line as shown.
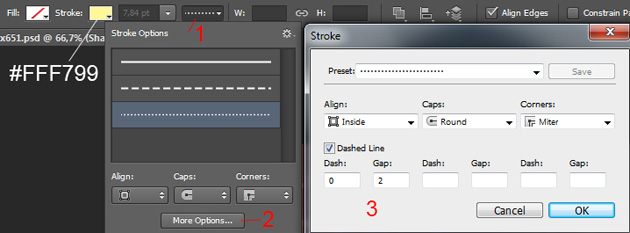
In Adobe Photoshop CS6, there’s now a convenient Stroke option on your Options Bar when you have a shape active. Use drop downs to set the next Stroke options for our circle, Fill – (None), Stroke color – #FFF799, Stroke type – Dotted:
Place the layer under the Christmas balls layers.

Set Fill to 49% for this layer.

Make four copies of the layer containing the thread and change the sizes on each copy. Place the layers the same way from below:

Create a new layer and select the Soft Round brush of white color (brush’s Opacity – 40%).
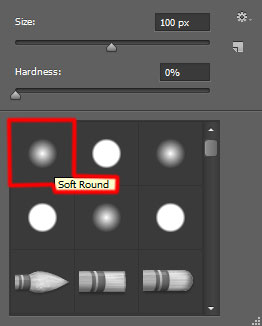
Use this brush to draw the highlights on the Christmas balls:

Set the Blending mode for this layer to Overlay.

Create a new layer and select the Paint Bucket Tool (G) to fill the new layer with #CB9659 color.

Set Fill to 20% for this layer and change the Blending mode to Soft Light.

Our Red and Gold Christmas Ball on Stars Background is finished!
Merry Christmas and Happy New Year!
Download free Layered PSD file.
View full size here.
Comments