
Build PHP Applications With Macromedia Dreamweaver MX
A Marriage Of Minds
You’ve already heard of Macromedia Flash, the de facto standard for high quality Web animation. But Flash is not the only ace up Macromedia’s sleeve – they’ve got another winner in their hands with their HTML authoring tool, aptly named Dreamweaver. The latest release of this product, recast as Dreamweaver MX, does a lot more than just help you create HTML pages – it’s now a full-featured rapid application development (RAD) tool for Web developers, and it can substantially reduce the time you spend coding ASP, JSP or PHP-based Web sites.
Most RAD tools include very limited support for PHP – which makes them unwelcome visitors on my computer, since most of my work involves working with PHP and MySQL-based sites. When I got my hands on Dreamweaver MX, though, I was impressed with its feature set and capabilities. Sure, it didn’t include *everything* on my wish list… but it’s clear that the guys at Macromedia have been thinking about the problem, and have made a serious effort to address PHP in their tool.
Over the next few pages, I’ll be exploring the new PHP functionality in Dreamweaver MX, in the hope that you find it useful the next time you have a PHP project to code. Come on in, and let’s get going!
Hooking Up
Our current development environment consists of a Windows/Linux network, with most developers developing code on Windows PCs and deploying to Linux-based servers. This kind of configuration is supported by Dreamweaver MX, as are other permutations and combinations – so matching the tool to your environment should not be a major issue.
The first step, obviously, is to get yourself a copy of the tool. Hook yourself up to a PC with a high-speed connection, log on to http://www.macromedia.com/software/, pick the appropriate version and platform, take Macromedia’s user survey (hey, nothing comes free anymore) and get yourself a trial copy. This trial copy works for 30 days, which is more than enough time for you to take the tool through its paces and decide whether it’s worth the price tag.
It’s a 49-meg download, so don’t try this if you’re faint of heart or have a s-l-o-w connection – instead, order a copy of the Macromedia evaluation kit on CD-ROM from the Macromedia online store. Sure, it’ll take a little longer to get to you, but it beats watching paint dry while the files download.

Installation is a breeze – click, accept the license terms (make sure you read them), click a few more times, and you’re done!
In case you’re wondering what the MX stands for… hey, join the club, because it seems even Macromedia doesn’t know. Here’s what their FAQ has to say on the topic:
“The MX moniker is not an acronym and doesn’t have a literal translation. MX designates products that are major new releases and part of the Macromedia MX product family.”
Ain’t that interesting?
I’m assuming here that the rest of your development box is all set up, with a Web server (I use Apache), PHP and a database server (MySQL rocks, get it here). In case you don’t have all these, get yourself set up, and then flip the page to take Dreamweaver MX for a test drive.
Test Drive
Dreamweaver MX’s interface can be quite daunting to developers used to working in plain-vanilla text editors for PHP development. Here’s a quick screen shot of the Dreamweaver work area:
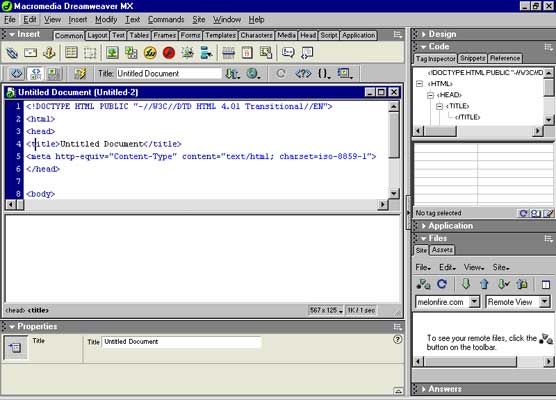
A quick overview of the interface, before we get into the nitty-gritty of PHP development using Dreamweaver MX. At the top is the “Insert” panel that gives you single-click access to insert important HTML elements like images, tables, hyperlinks et al. Obviously, Macromedia’s been careful to include support for their other products here too… it’s very, very easy to add media like Fireworks images and Flash movies to an HTML document created in Dreamweaver.

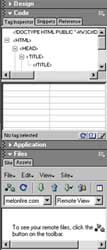
The right side of the Dreamweaver workspace includes a number of roll-up panels, each performing a very specific function:
- The “Design” panel allows the developer to add, edit and delete CSS and HTML styles, and add “behaviors” (ready-to-use JavaScript code snippets) to an HTML document.
- The “Code” panel provides a handy HTML code inspector that allows you quick access to any section of your HTML document, and also provides you with reference material in case you forget the difference between a
<tr>and a<td>. - The “Application” panel provides you with reusable objects that can be bound to your application, and used to reduce the time you spend on code development. I’ll be talking about this in greater detail a little further down.
- The “Files” panel provides you with a convenient file manager to view, edit and manipulate files, on both a local or remote server.
- The “Answers” panel provides quick access to Dreamweaver MX’s help files and search engine.
Finally, the bottom of the work area hosts the Properties panel, which allows you to alter the properties of the element currently being edited. In order to see how this works, try adding an image from the “Insert ” panel into your document, and notice how all relevant image properties appear at the bottom of the workspace, providing you with an easy way to make alterations to the element attributes.

Comments