
Siberian Winter
December 11, 2007 | 0 comments
Tips about how I made the Siberian Winter wallpaper (view wallpaper).
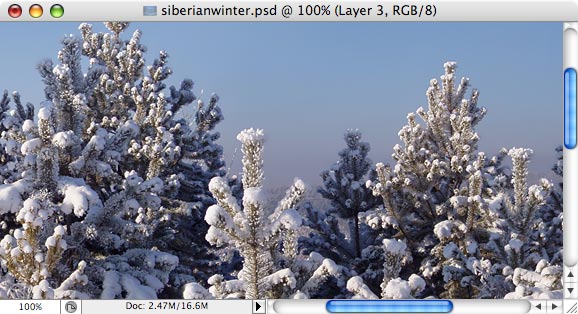
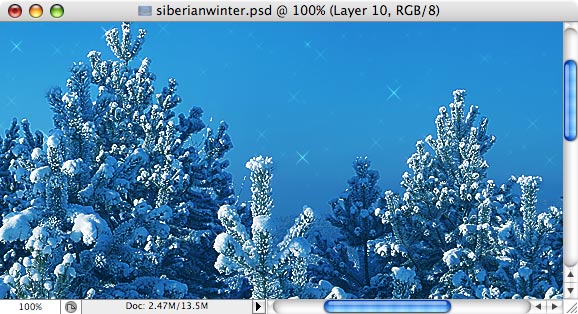
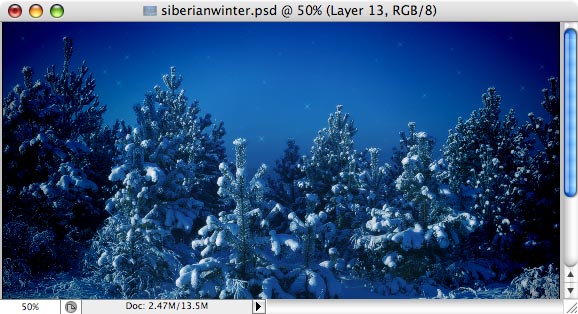
This is a short tutorial about how to bring some night and mystery into your bright sunny photo. Here is the photo I took in the forest near my home. IMPORTANT NOTE – all steps below are true only for this very photo! This tutorial is only to describe general approach. Trust your eyes when applying effects.
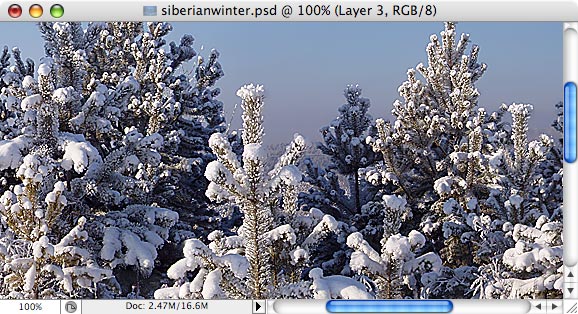
Use Sharpen effect several times, until the snow starts to glow.
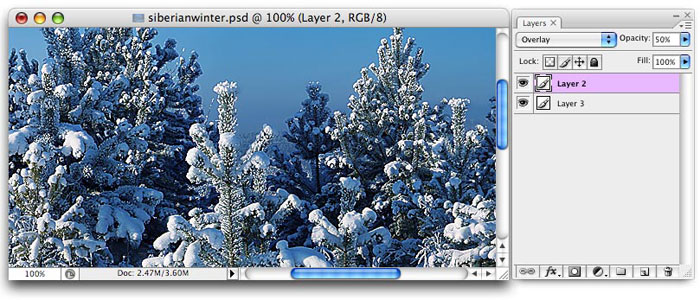
Create new layer, fill with color (in this case, blue).
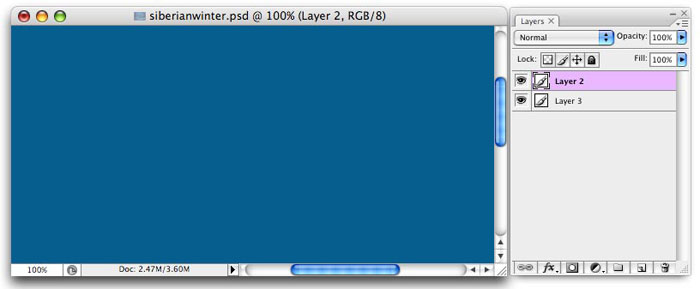
Set layer blend mode to Overlay and opacity to 50%.
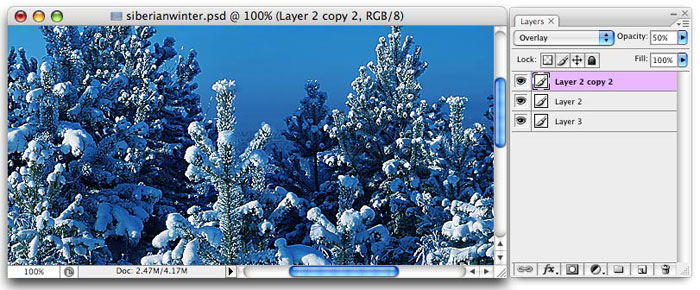
Duplicate this layer, so that color overlay is more vivid.

If you want to make image a bit brighter, duplicate layer again, set its blend mode to Screen, and opacity to 30%.

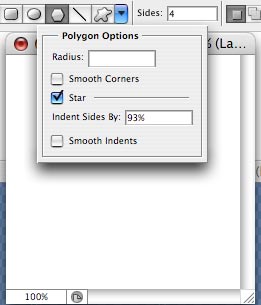
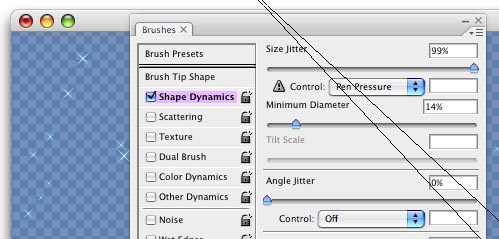
Now we want to add some light sparks. For that, we need a custom brush. Create new (square) document, select Shape tool, choose Polygon, set Side to 4, and in Polygon options, set indent to 93 and check Star checkbox.
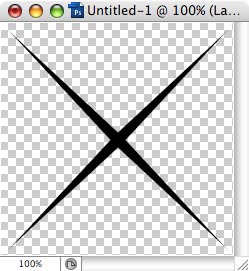
Now simply create such shape, filling entire document. Rasterize layer, then go to Edit menu -> Define Brush Preset. After that, close this document.
In our original document, make new layer. Open Brush settings (Window menu – brushes). Click Brush Tip Shape, choose the brush you just made, set Size to 40-60px and Spacing to 1000%. Then click Shape Dynamics, set Size Jitter to 99% and Minimu diameter to about 15%.
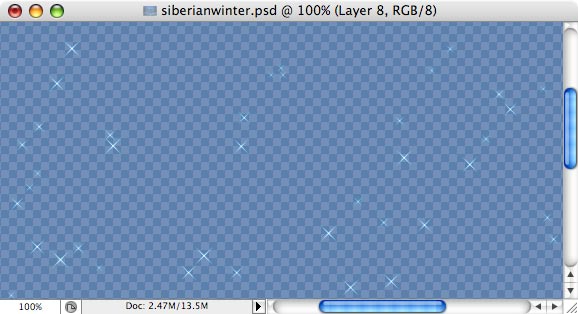
Now it is very easy to put sparks here and there! You can also add Outer Glow layer effect.
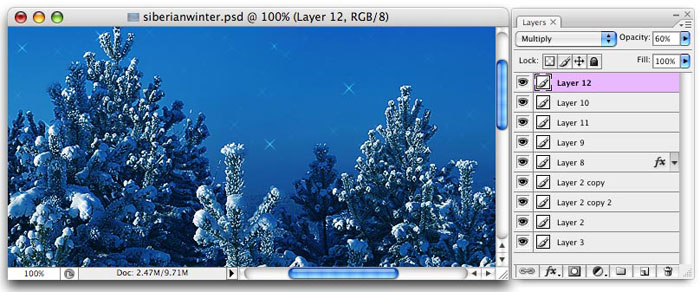
Here is how all our layers look together.
next step: Select all, copy merged (Ctrl-Shift-E) and paste into new layer (Ctrl-V). Then, set this new layer blend mode to Multiply and opacity to 50-60%
Then again, select all, copy merged and paste. Then, apply Gaussian Blur filter with 5-10px radius.
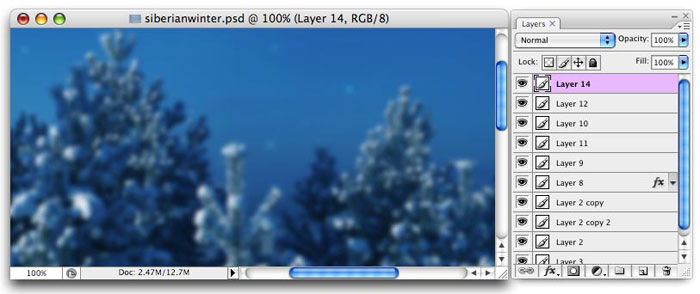
Now set this layer opacity to 20-25%. Almost done!
The final touch is dark edges, made by very large black brush (in new layer with Color Burn blend mode).
The final touch is dark edges, made by very large black brush (in new layer with Color Burn blend mode).
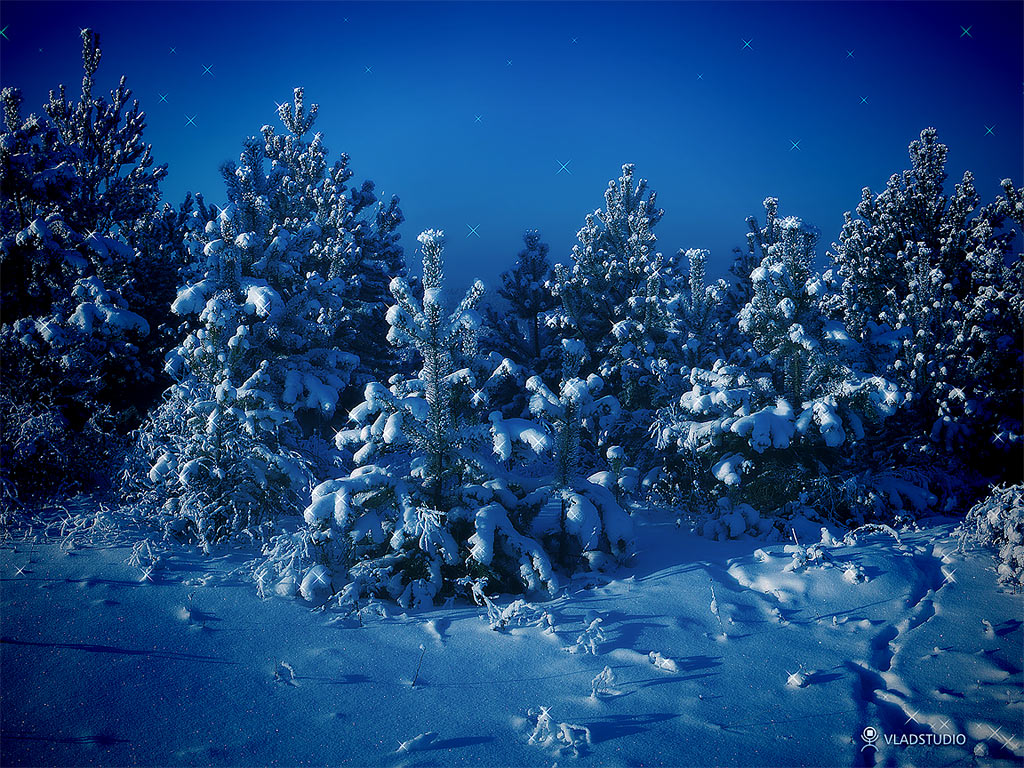
Siberian Winter wallpaper (view wallpaper).
Comments